Are you looking to enhance the impact and viewer engagement of your helmet camera videos? One effective way is to add music. But what are the best practices for incorporating music into your videos? How do you ensure that the music complements your footage without overpowering it? And what about licensing to avoid copyright infringement? In this article, we will explore the answers to these questions and provide you with valuable insights on how to create compelling and engaging helmet camera videos that captivate your audience.
Key Takeaways:
- Adding music to helmet camera videos can greatly enhance their impact and viewer engagement.
- Select music that complements the mood and energy of your footage.
- Ensure the music doesn’t overpower the audio from the helmet camera.
- Properly license the music to avoid copyright infringement.
- Create compelling and engaging helmet camera videos by following best practices.
Camera Settings and Modes for Action Filming
When it comes to action filming with an action camera, the right camera settings and shooting modes can make a world of difference in capturing high-quality footage. By optimizing your camera settings and utilizing various shooting modes, you can elevate your helmet camera videos to the next level.
Camera Settings
To ensure the best footage quality, it is essential to adjust your camera settings appropriately. Here are some key camera settings to consider:
- Resolution: Set a high resolution to capture the action in crisp detail. Higher resolutions, such as 4K or 1080p, offer greater clarity and make for more immersive viewing experiences.
- Frame Rate: Choose a higher frame rate to capture smooth and fluid motion. Higher frame rates, such as 60fps or 120fps, are ideal for capturing fast-paced action.
- Field of View: Opt for the widest field of view available on your camera. A wide field of view creates a more immersive perspective, allowing viewers to feel like they are right in the middle of the action.
- Image Stabilization: Enable image stabilization to minimize camera shake. This feature helps to create steady and shake-free footage, even in dynamic and fast-moving environments.
Shooting Modes
Experimenting with different shooting modes can add variety and visual interest to your action footage. Here are some shooting modes to consider:
- Time-lapse: Use the time-lapse mode to condense long durations into short, visually captivating sequences. This mode is perfect for capturing the passage of time or showcasing slower-paced activities.
- Slow Motion: Slow-motion mode allows you to capture and emphasize fast movements with greater detail and drama. This mode is ideal for highlighting dynamic action or adding a dramatic effect to your footage.
By adjusting your camera settings and utilizing different shooting modes, you can capture action-packed footage that truly engages your viewers. Remember to experiment and find the settings and modes that best suit your specific filming needs.
Mounting Techniques for Action Camera Filming
Achieving stable and dynamic footage is essential for action camera filming. To capture exciting and engaging footage for your helmet camera videos, it’s important to choose the right mounting technique based on your activity. Here are some popular mounting options:
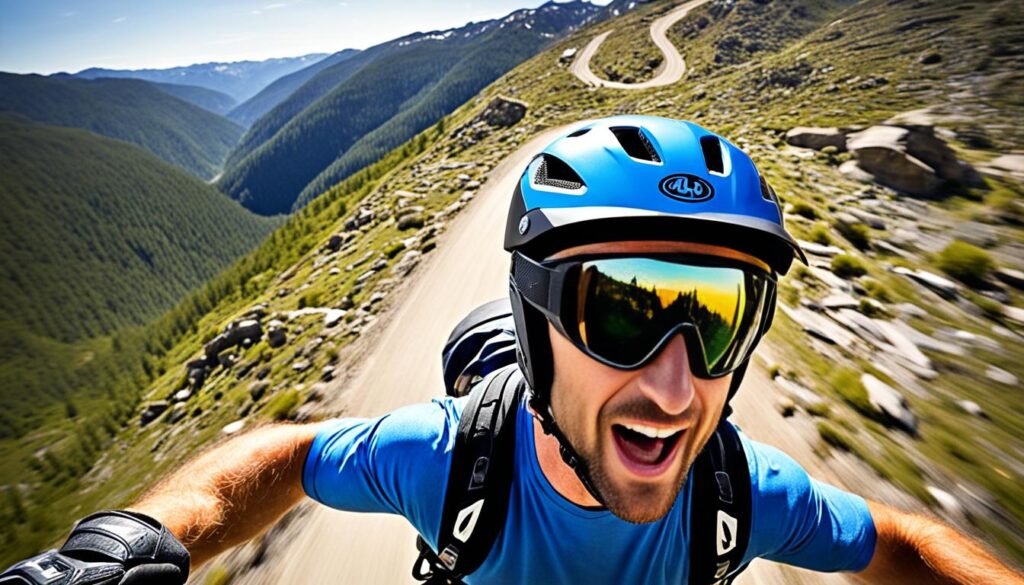
Helmet Mount
The helmet mount provides a first-person perspective, allowing viewers to experience the action through the eyes of the wearer. It’s ideal for capturing intense action scenes, such as skiing, snowboarding, or motocross. The helmet mount ensures stability and immerses the viewer in the heart of the action.
Chest Mount
The chest mount offers stability and an immersive viewpoint. By attaching the action camera to your chest, you can capture hands-free footage with a wider field of view. It’s perfect for activities like mountain biking, hiking, or rock climbing, where a first-person perspective is desired without the movement of the helmet affecting the footage.
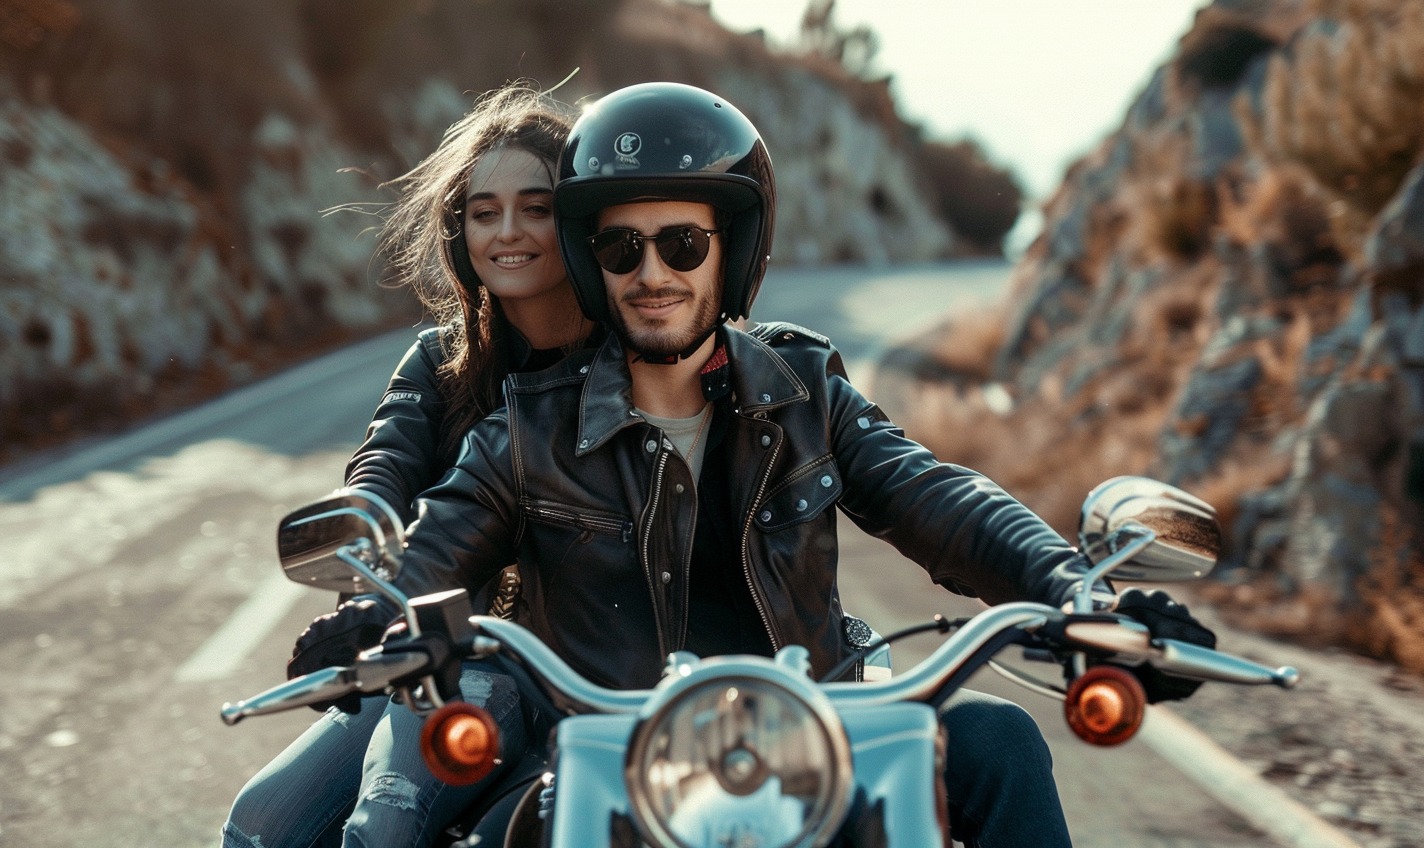
Handlebar Mount
The handlebar mount is designed for cyclists, motorcyclists, or any activity where you need to attach the camera to handlebars. This mount provides a unique perspective, allowing viewers to experience the ride from the cyclist’s point of view. It ensures stable and smooth footage, enabling you to capture the excitement as you navigate different terrains.
Drone Mount
When you want to capture aerial footage for your action camera videos, a drone mount is the way to go. By mounting your camera on a drone, you can capture stunning aerial views and dynamic shots from above. It adds an entirely new dimension to your videos, showcasing breathtaking landscapes and perspectives.
Whether you’re skiing down a mountain, biking through rugged trails, or capturing epic aerial shots, choosing the right mounting technique is crucial for action camera filming. Experiment with different mounts to find the one that best suits your activity and creative vision.
| Mounting Technique | Best For | Advantages |
|---|---|---|
| Helmet Mount | Intense action scenes (skiing, snowboarding, motocross, etc.) | – First-person perspective – Stability – Immersive experience |
| Chest Mount | Hands-free footage (mountain biking, hiking, rock climbing, etc.) | – Stability – Wider field of view – First-person perspective without helmet movements |
| Handlebar Mount | Cycling, motorcycling, or activities with handlebars | – Unique perspective – Stable and smooth footage – Capturing the excitement of the ride |
| Drone Mount | Aerial footage | – Stunning aerial views – Dynamic shots from above – Showcasing breathtaking landscapes |
Action Camera Filming Techniques for Dynamic Shots
Action cameras are widely used for capturing dynamic shots in various genres, including sports, adventure, and travel videos. To make your helmet camera footage visually captivating, it’s important to employ different filming techniques that add interest and excitement to your videos.
Experiment with Mounting Options
One way to enhance the dynamic nature of your shots is to experiment with various mounting options. Mount your action camera on different surfaces and objects to capture unique angles and perspectives. Whether it’s attaching your camera to a helmet, chest mount, handlebar, or even a drone, each mounting option offers a distinct viewpoint that can elevate the visual impact of your footage.
Utilize Image Stabilization
Shaky footage can dampen the overall quality of your helmet camera videos. To ensure steady and smooth shots, make use of the built-in image stabilization feature on your action camera. By reducing unwanted camera movements, image stabilization helps maintain clarity and focus, allowing viewers to fully appreciate the action-packed scenes you’ve captured.
Incorporate Point of View Shots
One effective technique for immersing viewers in the action is to incorporate point of view (POV) shots. These shots allow your audience to experience the thrill and excitement as if they were right there with you. Attach the action camera to helmets, goggles, or other gear to capture the authentic perspective of the action. POV shots create a strong connection between the viewer and the footage, making it a powerful tool for storytelling.
“Point of view shots give the viewers a sense of being part of the action, making them feel as if they’re right in the middle of the adventure.”
Highlight Fast Movements with Slow Motion and Time-lapse
Building anticipation and emphasizing fast movements can be achieved by utilizing slow-motion and time-lapse modes. Slow motion enables you to showcase the finer details of high-speed actions, emphasizing the intensity of the moment. On the other hand, time-lapse sequences condense lengthy activities into visually dynamic sequences, providing a unique perspective on the passage of time.
By incorporating these filming techniques into your helmet camera videos, you can create visually stunning and engaging content that captures the essence of the action. Let your creativity flow and experiment with different approaches to truly elevate your footage.

Post-Processing and Editing Tips for Action Camera Footage
Once you’ve captured your thrilling action camera footage, the next step is to enhance it through post-processing and editing techniques. By following these tips, you can transform your raw footage into polished and impactful helmet camera videos.
1. Smooth out shaky footage with video stabilization
If your action camera footage contains unwanted camera shakes or vibrations, video stabilization techniques can help. There are various software tools and plugins available that can analyze and correct shaky footage, resulting in smoother and more professional-looking videos. Applying video stabilization can significantly improve the overall viewing experience.
2. Enhance visual appeal with color correction and grading
Color correction and grading are essential processes in post-processing action camera footage. By adjusting the colors, contrast, and saturation levels, you can create a consistent and visually appealing look throughout your video. This step helps to enhance the mood, atmosphere, and overall aesthetic of your footage, making it more captivating for viewers.
3. Add music and sound effects for an immersive experience
Music and sound effects play a crucial role in setting the tone and enhancing the overall viewing experience of your helmet camera videos. Choose music that aligns with the energy and mood of your footage, whether it’s fast-paced and thrilling or serene and contemplative. Additionally, adding sound effects can further immerse viewers in the action and make the footage more engaging.
4. Trim and cut unnecessary parts for viewer engagement
To maintain viewer engagement, it’s important to trim and cut unnecessary parts from your footage. This includes removing any repetitive or monotonous sections, as well as eliminating any footage that doesn’t contribute to the overall narrative or visual impact of the video. By keeping your videos concise and focused, you can captivate your audience and hold their attention throughout.
5. Experiment with different editing techniques
Don’t be afraid to experiment with different editing techniques to add style and variety to your helmet camera videos. This could include incorporating slow-motion sequences to highlight specific moments, using time-lapse to showcase the passage of time, or applying unique transitions between shots. By exploring different editing techniques, you can create a distinctive visual language that sets your videos apart.
Remember, the key to successful post-processing and editing is to strike a balance between enhancing the visual appeal of your footage and maintaining its authenticity. Aim for a professional finish while staying true to the original action and excitement captured by your helmet camera.
Now that you have learned how to post-process and edit your action camera footage, let’s explore how accessories can further enhance your helmet camera recordings.
Using Accessories to Enhance Your Helmet Camera Recordings
Accessories play a vital role in elevating the quality and versatility of your helmet camera recordings. By incorporating the right accessories, you can enhance stabilization, improve visuals, and capture crystal-clear audio.
Stabilizers for Smooth Footage
Stabilizers such as gimbals or tripods are essential accessories for achieving stable and smooth footage. They help minimize shakiness, creating professional-looking recordings that captivate your audience. With a stabilizer, you can confidently capture dynamic action shots without compromising video quality.
Filters for Enhanced Visuals
In challenging lighting conditions, filters are a game-changer. They improve color accuracy and contrast, resulting in visually stunning recordings. Whether you’re filming in bright sunlight or low-light environments, filters allow you to capture the true essence of the scene and immerse viewers in your adventures.
External Microphones for High-Quality Audio
Audio quality plays a crucial role in creating immersive helmet camera recordings. By using an external microphone, you can capture clear and crisp audio while reducing background noise. This accessory is especially useful for action-packed videos where capturing every detail, such as conversations or ambient sounds, is essential.
Lights for Low-Light Situations
When recording in low-light environments, proper lighting is key to ensuring your footage is sharp and vibrant. Lights designed specifically for helmet cameras help illuminate your subjects, providing excellent visibility and clarity. Whether you’re exploring caves, skiing at night, or cycling at dusk, these lights will enhance the quality of your recordings.

Image: Using accessories like stabilizers, filters, external microphones, and lights can greatly enhance the quality of your helmet camera recordings.
By utilizing these accessories, you can take your helmet camera recordings to the next level. Whether you’re a sports enthusiast, a travel vlogger, or an adventure seeker, the right accessories will help you capture breathtaking footage that engages and captivates your audience.
Tips for Capturing Stable Footage with Your Helmet Camera
Capturing stable footage is crucial for creating high-quality helmet camera videos. The last thing you want is shaky and blurry footage that distracts your viewers from the action. To ensure stable footage, consider the following tips:
Choose the Right Mounting Options
Mounting your helmet camera properly is essential for stable footage. Depending on your activity, select the appropriate mounting option that suits your needs.
- Helmet Mounts: Helmet mounts provide a first-person perspective and are ideal for capturing intense action.
- Chest Mounts: Chest mounts offer stability and an immersive viewpoint.
Pro Tip: Experiment with different mounting options to find the one that works best for your specific activity and desired footage.
Avoid Glare and Overexposure
The position of the sun can greatly affect the quality of your footage. To avoid glare and overexposure, take note of the sun’s position and adjust your camera angle accordingly.
Be Prepared for Different Weather Conditions
Weather conditions can impact the stability of your footage. When filming in various weather conditions, be sure to take the necessary precautions:
- Wind: Use wind-resistant mounting options or consider using a stabilization device.
- Rain: Invest in a waterproof housing or cover for your camera to protect it from water damage.
- Extreme Heat or Cold: Use appropriate protective gear or mounts to shield your camera from extreme temperatures.
Pro Tip: Always check the weather forecast before heading out to film and plan accordingly to ensure stable footage.
By implementing these tips, you can capture stable footage with your helmet camera, resulting in visually appealing and captivating videos.
Conclusion
Adding music to your helmet camera videos can greatly enhance their impact and viewer engagement. By following best practices for camera settings, mounting techniques, filming techniques, post-processing, and using accessories, you can create helmet camera videos that are compelling and engaging.
Experimenting with different approaches and continuously refining your skills will allow you to produce high-quality videos that captivate your audience. Remember to push the boundaries of your creativity and storytelling to create helmet camera videos that truly stand out.
Whether you’re capturing extreme sports, epic adventures, or everyday activities, incorporating music along with the right camera settings, mounting techniques, and editing can elevate the overall viewing experience and make your videos more memorable. Keep honing your skills, exploring new techniques, and staying up to date with trends to produce helmet camera videos that leave a lasting impression on your viewers.
Source Links
- https://www.kentfaith.com/blog/article_how-to-film-with-action-camera_11178
- https://www.kentfaith.com/blog/article_how-to-record-with-action-camera_6916
- https://www.itchyboots.com/academy/motorcycle-vlogging-101
Meet James Smith, affectionately known by friends as ‘Biker Smith’, your go-to expert at ‘Best HD Helmet Camera’. At 35, living in the USA, James embodies the spirit of adventure. His life is a thrilling ride, powered by his Harley Davidson Softail and BMW S 1000 RR, with his girlfriend as his favorite travel companion. A software developer by profession, James’s heart beats for the open road, making him a full-time traveler at heart. His passion for biking and technology merges seamlessly on this platform. Recognizing a gap in discussions around helmet cameras, he founded this blog to educate and inspire fellow enthusiasts. His mission? To elevate your riding experience with the best HD helmet camera insights, backed by firsthand experiences, rigorous testing, and a genuine love for the ride. Trust James to guide you through the world of helmet cameras, where quality, innovation, and safety ride together.