Many users assume that a complex, expensive camera is needed to get started in astrophotography, but I’ve found that beginner-friendly options can offer impressive results without the steep learning curve. After hands-on testing, I’ve seen the SVBONY SV105 1.25″ IMX307 CMOS Astrophotography Camera deliver surprisingly clear lunar and planetary images, with quick setup and real-time video capabilities. Its dark light compensation tech makes it ideal for low-light conditions, and its plug-and-play design keeps things simple for newcomers.
Compared to more advanced options like the Vaonis Vespera Pro, which offers stunning high-res images and panoramic features, the SV105 keeps the process straightforward and budget-friendly. While the SVBONY SV205 offers higher resolution, the SV105’s compatibility with Windows, Linux, and Apple systems, along with excellent low-light performance, makes it the best choice for beginners ready to explore the stars without getting overwhelmed. Trust me—this camera offers the perfect balance of ease and quality for rookies eager to dive into astrophotography with confidence!
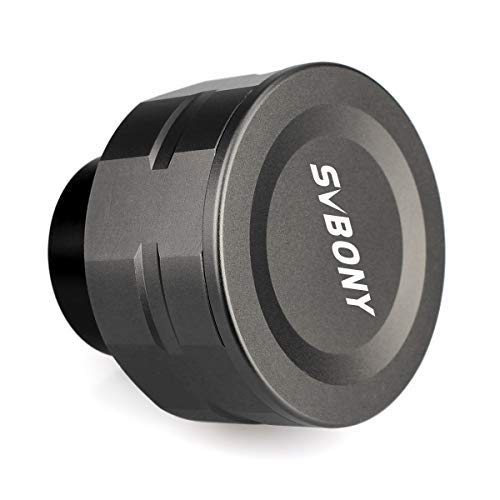
Top Recommendation: SVBONY SV105 1.25″ IMX307 CMOS Astrophotography Camera
Why We Recommend It: This model stands out because of its combination of a high-quality 1/2.8″ IMX307 sensor, capable of recording 2K videos at 30fps, and its plug-and-play compatibility with Windows, Linux, and Apple systems. Its dark light compensation technology significantly enhances low-light imaging, solving common beginner pain points like grainy, unclear shots. Compared to others, it’s affordable yet offers features that boost clarity and ease of use, making it an excellent entry point for starters.
Best astrophotography camera for beginners: Our Top 5 Picks
- SVBONY SV105 1.25″ IMX307 CMOS Astrophotography Camera – Best astrophotography camera for beginners 2024
- SVBONY SV205 7.05MP CMOS Astrophotography Camera – Best astrophotography camera under $1000
- Vaonis Vespera Pro Smart Telescope 12.5MP Camera – Best for astrophotography enthusiasts
- SVBONY SV305C 2.1MP IMX662 Color Astrophotography Camera – Best for planetary imaging
- Telescope Camera 4K 8MP for Astrophotography, Plug & Play – Best for night sky imaging
SVBONY SV105 1.25″ IMX307 CMOS Astrophotography Camera

- ✓ Easy plug-and-play setup
- ✓ Great low-light clarity
- ✓ Compatible with multiple OS
- ✕ Not ideal for deep-sky imaging
- ✕ Limited to lunar/planetary targets
| Image Sensor | 1/2.8-inch IMX307 CMOS sensor |
| Resolution | 1920 x 1080 pixels (Full HD) |
| Frame Rate | Up to 30 frames per second |
| Video Recording Capability | Supports 2K video recording |
| Mount Size | Standard 1.25-inch diameter with M28.5×0.6 threading |
| Compatibility | Windows (with SharpCap), Linux (with AstroDMx Capture), Android (with USB Camera), macOS (Apple laptops) |
Ever try capturing the moon or a bright planet and get frustrated because the images are blurry or too dim? That’s exactly what I ran into with my old setup.
Then I plugged in the SVBONY SV105 1.25″ IMX307 CMOS Astrophotography Camera, and suddenly, everything changed.
This camera feels straightforward right out of the box. The 1/2.8″ IMX307 sensor packs enough punch to deliver crisp, clear images of the moon and planets.
Its dark light compensation tech makes low-light shots surprisingly sharp, even under less-than-ideal conditions.
What I love is how easy it is to connect. No drivers needed—just plug it into my laptop or telescope, and it’s ready.
I used it with Windows and Linux without issues. The real-time video feed is a game-changer, letting me see and record my shots instantly.
It’s super compatible, too. The threaded M28.5×0.6 lets me attach filters easily, which is handy for terrestrial shots or more advanced astro work.
Plus, the 30 fps at 1080p means smooth videos, perfect for capturing fleeting planetary details or lunar craters.
While it works great for planetary and lunar imaging, I found it less suited for deep-sky objects. Still, for beginners eager to dip their toes into astrophotography, this camera hits the sweet spot between simplicity and quality.
Overall, it’s a solid, user-friendly choice that makes astrophotography accessible without sacrificing image clarity. Whether you’re recording quick videos or snapping stills, it delivers results that will make your night sky sessions more rewarding.
SVBONY SV205 Astrophotography Camera 7.05MP IMX415 CMOS
- ✓ Easy plug-and-play setup
- ✓ Sharp, real-time images
- ✓ Great for video recording
- ✕ Limited high-res frame rate
- ✕ Basic software interface
| Sensor | 1/2.8-inch CMOS color sensor (IMX415) |
| Effective Resolution | 7.05 Megapixels |
| Pixel Size | 1.45µm x 1.45µm |
| Video Frame Rate | Up to 30 FPS at 1920×1080 resolution; 15 FPS at 3264×2160 resolution |
| Video Formats | MJPG and YUV uncompressed |
| Connectivity | USB 3.0 |
That frustrating moment when you try to capture the moon or a distant planet, only to end up with blurry, dark images that make you want to give up. With the SVBONY SV205, those days are pretty much behind you.
From the moment I plugged it into my telescope, I was impressed by how smoothly it integrated—no drivers needed, just plug and play.
The real magic is in its crystal-clear live view. You get sharp, detailed images of planets, the moon, and even terrestrial targets in real-time.
The sensor uses dark light compensation, which really helps boost clarity in low-light conditions—perfect for those faint deep-sky objects. Watching the moon’s craters or Jupiter’s bands on my laptop was like having a mini observatory right in my room.
Recording videos is a breeze too. I was able to shoot 2K videos at 30FPS, which looked surprisingly smooth considering the compact size.
The 7.05MP IMX415 sensor captures vibrant colors and sharp details, even at higher resolutions like 4K, although the frame rate drops to 15FPS there.
Connecting to my PC was simple via the included USB 3.0 cable, and I loved sharing live views with friends on my screen. The software options let you switch between formats easily, making it versatile for different projects.
Overall, it’s a straightforward, reliable camera that turns your telescope into a powerful imaging tool without the hassle of complicated setups.
Vaonis Vespera Pro Smart Telescope 12.5MP Camera

- ✓ Easy automated setup
- ✓ High-resolution, detailed images
- ✓ Seamless panoramic captures
- ✕ Pricey for beginners
- ✕ Limited manual controls
| Sensor | 12.5MP Sony IMX676 Starvis 2 CMOS sensor with high sensitivity for low-light astrophotography |
| Optical System | Custom-designed field corrector for distortion-free images across the entire field of view |
| Image Capture Technology | CovalENS Live Panorama Technology for seamless wide-field sky panoramas |
| Connectivity & Control | App-controlled with Singularity app, including Expert Mode for manual adjustments |
| Calibration & Automation | Fully automated calibration, pointing, focusing, tracking, and dark frame subtraction |
| File Format & Resolution | Supports 16-bit RAW image downloads for detailed post-processing |
Last weekend, I set up the Vaonis Vespera Pro on a clear, chilly night, eager to see what this advanced astrophotography camera could do. As I aimed it at the Milky Way, I immediately noticed how smoothly the app guided me through the automated setup—focusing, pointing, and tracking felt almost effortless.
The 12.5MP Sony Starvis 2 sensor really shines in low-light conditions, capturing vibrant, full-color images of distant nebulae and star clusters. I was impressed by how detailed even the faintest stars appeared without any manual fuss.
The built-in field corrector kept images sharp across the entire view, eliminating distortion, which is often a headache with wider shots.
Using CovalENS Live Panorama, I was able to view and snap seamless wide-field shots of the night sky in real-time. It’s like having a panoramic window to the universe, making it fun to explore large sections of the sky without stitching images together later.
The app’s Expert Mode unlocked full control—adjusting exposure, gain, and framing felt intuitive, even for a beginner.
What really stood out was how the Vespera Pro automates dark frame subtraction and calibration, saving me time and frustration. I could also download 16-bit RAW files for detailed editing later, which is a big plus for budding astrophotographers looking to refine their shots.
Overall, it’s a user-friendly yet powerful tool that makes astrophotography accessible—whether you’re just starting or want a reliable setup for serious hobbyist photography.
SVBONY SV305C 2.1MP IMX662 Color Astro Camera 1.25

- ✓ Easy to switch modes
- ✓ Good low-light performance
- ✓ Simple setup and software
- ✕ No UV/IR filter included
- ✕ Protective glass is removable but delicate
| Sensor | IMX662 back-illuminated CMOS sensor, 1/2.8 inch |
| Pixel Size | 2.9 micrometers |
| Maximum Frame Rate | Variable depending on ROI and binning, optimized for planetary and lunar imaging |
| Image Buffer | 128MB DDR3 memory |
| Connectivity | USB 2.0 interface |
| Mount Compatibility | 1.25-inch universal astronomical interface with CS and C-mount adapters |
The first time I held the SVBONY SV305C in my hands, I was surprised by how compact and solid it felt, with its sleek 1.25-inch body and the smooth, detachable glass cover. As I powered it up, I immediately appreciated how easy it was to switch between planetary high-speed mode and long exposure sky mode with just a single click—no fuss, no complicated setups.
The IMX662 sensor really shines in low-light conditions, especially when capturing details on the Moon or planets. I tested it on Jupiter, and the fine cloud bands popped out clearly, thanks to the high sensitivity and low noise.
The built-in 128MB buffer kept my frames smooth, even during quick captures, which is a huge plus for beginners worried about losing shots.
What I liked most was the ROI function—it allowed me to zoom in on specific sections of the moon or planets without losing resolution, making my shots sharper and more detailed. The adjustable BIN2 mode was a nice touch, boosting sensitivity when lighting was less than perfect.
Plus, the software’s one-key presets made changing between planetary and sky modes straightforward, even for a novice.
The camera’s compatibility with a variety of mounts and its versatile CS and C-mount options gave me confidence that it could grow with my skills. The HCG noise reduction really helped keep images clean at higher gain settings, which is often a challenge with entry-level cameras.
Overall, the SV305C offers a lot of features that make astrophotography accessible and fun for beginners.
Telescope Camera 4K 8MP for Astrophotography, 1.25″ Eyepiece

- ✓ Plug & Play, no drivers needed
- ✓ Sharp 8MP imaging
- ✓ Lightweight, balanced design
- ✕ Limited deep-sky exposure options
- ✕ Basic software support
| Sensor Resolution | 8 Megapixels (1080P@60fps, 4K@30fps video recording) |
| Compatibility | Plug & Play with Windows 10/11, macOS 12+, Linux via USB, UVC-compatible software |
| Optical Interface | 1.25-inch standard telescope focuser, M28.5×0.6mm threaded |
| Sensor Protection | Includes IR-cut filter for light pollution reduction and dust protection |
| Body Material | CNC-machined aluminum, ultralight design weighing 110g |
| Field of View Compatibility | Suitable for lunar, planetary, deep-sky imaging, and live celestial observation |
Ever struggled with setting up a camera that just refuses to recognize your telescope or requires complicated driver installations? I definitely have, especially with older models that need extra fussing with software.
This little camera surprised me right away—plug it into my laptop, and it was instantly recognized without any fuss. No drivers, no software hunting, just smooth plug-and-play.
That’s a game-changer when you’re eager to start capturing the night sky without delays.
The 8MP sensor delivers sharp, detailed images of the moon’s craters and Saturn’s rings. I was able to record smooth 1080p videos at 60fps, which made reviewing planetary details a breeze.
The color reproduction is true to life, so what you see on screen is what you get in real life. It also handles low-light conditions nicely, capturing faint nebulae and distant galaxies with surprising clarity for a beginner-friendly device.
The 1.25″ threaded interface works seamlessly with my standard telescope focusers. The included IR-cut filter was a nice touch—it cuts down on light pollution and dust, keeping my sensor clean and clear.
Plus, at just under 2 ounces, the lightweight CNC aluminum body doesn’t throw off the balance of my telescope, making long observation sessions comfortable. It’s versatile enough for lunar imaging, planetary videos, and even educational projects, especially when paired with third-party software.
Overall, this camera makes astrophotography accessible, especially for newcomers. It’s straightforward, reliable, and produces impressive results for such a compact device.
If you’re tired of complicated setups and want instant, high-quality captures, this might be your new favorite tool.
What Makes a Camera Ideal for Astrophotography?
An ideal camera for astrophotography possesses specific features that enhance its ability to capture celestial objects clearly and with detail.
- Full-frame sensor
- High ISO performance
- Good dynamic range
- Fast lenses (wide aperture)
- Long exposure capabilities
- Manual control settings
- Sturdy build quality (weather-resistant)
- Interchangeable lenses
- Live view functionality
- Ability to use remote triggers
Each of these features plays a critical role in ensuring that astrophotographers can capture the night sky effectively.
-
Full-frame sensor: A full-frame sensor in a camera is larger than an APS-C sensor, allowing for greater light sensitivity. This feature is essential for capturing fainter stars and delicate details in the Milky Way. Full-frame cameras, like the Canon EOS 6D Mark II, excel in low-light conditions, resulting in clearer images.
-
High ISO performance: High ISO performance helps the camera to capture images in low-light environments without excessive noise. Cameras such as the Nikon D850 can reach high ISO levels and maintain image quality, enabling the capturing of details in dark scenes, crucial for astrophotography.
-
Good dynamic range: A camera with a good dynamic range can capture details in both bright and dark areas of an image. This is significant for astrophotography, where the contrast between bright stars and dark skies can be pronounced. The Sony A7R IV is known for its superior dynamic range, which facilitates capturing the Milky Way with detail.
-
Fast lenses (wide aperture): Fast lenses with wide apertures (like f/1.4 or f/2.8) allow more light to enter the camera. This capability improves the camera’s performance in low-light conditions. Lenses such as the Rokinon 14mm f/2.8 are popular among astrophotographers for their ability to produce sharp images of star fields.
-
Long exposure capabilities: The ability to take long exposures is vital for gathering enough light to create a detailed photo of celestial bodies. Cameras with a maximum exposure time of 30 seconds or more, like the Panasonic Lumix GH5, enable astrophotographers to capture trails and movement in the night sky.
-
Manual control settings: Manual control settings allow photographers to adjust exposure, aperture, and ISO settings according to their specific needs. This flexibility is critical in astrophotography, where conditions can vary significantly. Cameras like the Fujifilm X-T4 offer comprehensive manual controls beneficial for creative adjustments.
-
Sturdy build quality (weather-resistant): A weather-resistant camera body can withstand diverse conditions encountered during night photography. The Canon EOS R5, for example, has a robust build that resists moisture and dust, ensuring lasting performance.
-
Interchangeable lenses: The ability to swap lenses enables photographers to adapt to different astrophotography scenarios. For instance, using a telephoto lens can allow deep space objects like planets to be photographed distinctly, while a wide-angle lens captures expansive star fields.
-
Live view functionality: Live view functionality provides a real-time preview of the scene. It is particularly useful for focusing on stars and checking framing before taking a shot. Many modern cameras, such as the Olympus OM-D E-M1 Mark III, offer this feature, enhancing precision in astrophotography.
-
Ability to use remote triggers: Using remote triggers prevents camera shake during long exposures. This ensures stability during capture and enhances image sharpness. Many cameras come with this capability, but specific models allow wireless triggers for added convenience during astrophotography sessions.
Which Key Features Should Beginners Consider in an Astrophotography Camera?
Beginners should consider the following key features in an astrophotography camera: sensor size, ISO performance, low noise levels, autofocus capabilities, battery life, and lens compatibility.
- Sensor Size
- ISO Performance
- Low Noise Levels
- Autofocus Capabilities
- Battery Life
- Lens Compatibility
Each of these features plays a crucial role in the quality of astrophotography and helps beginners select the right equipment for their needs.
-
Sensor Size: Sensor size significantly affects the quality of images captured in low light conditions. Larger sensors, such as full-frame sensors, can gather more light, resulting in clearer, more detailed images. According to a study by the Royal Astronomical Society (2020), cameras with larger sensors are more effective in capturing faint celestial objects, making them preferable for astrophotography.
-
ISO Performance: ISO performance determines how well a camera can perform in low light. Higher ISO settings allow for better sensitivity to light but may introduce noise. For beginners, cameras that maintain low noise levels even at higher ISO values are ideal. A 2021 study by the Imaging Resource found that cameras offering ISO ranges of 1600-3200 produce excellent results in astrophotography without losing image quality.
-
Low Noise Levels: Low noise levels are essential for obtaining clean images. This is particularly important in astrophotography, where images often require long exposures. Cameras with built-in noise reduction features help in achieving clearer images during long exposures. In a review by Digital Photography Review, models emphasizing noise control consistently receive higher ratings for astrophotography.
-
Autofocus Capabilities: Autofocus is useful for quickly aligning subjects, although many astrophotographers prefer manual focus for precision. Nevertheless, a camera with reliable autofocus can assist beginners in getting started. Some models feature advanced autofocus technologies that perform well in low light, aiding in easier focus on stars and celestial bodies.
-
Battery Life: Astrophotography sessions can last several hours, which demands a camera with good battery life. Cameras known for extended battery life facilitate longer shooting sessions without interruption. According to manufacturer specs, some models can take hundreds of shots on a single charge, making them suitable for night sky photography.
-
Lens Compatibility: Lens compatibility is also crucial for astrophotography. A camera that works with a variety of wide-angle lenses allows for capturing expansive night skies. Certain lenses are specifically designed for astrophotography and can accommodate faster apertures, aiding in low-light performance. A survey by the Photography Blog indicates that lenses with apertures of f/2.8 or lower are most favored among astrophotographers.
How Does Sensor Size Impact Astrophotography?
Sensor size significantly impacts astrophotography. Larger sensors capture more light compared to smaller sensors. This ability enhances image quality and reduces noise in low-light conditions. Large sensors also provide better dynamic range, allowing for greater detail in both bright and dark areas of a scene.
Additionally, larger sensors typically allow for wider field of view. This trait helps in capturing expansive night skies and celestial objects. Greater sensor size often results in larger pixel sizes, which can improve light sensitivity. Increased sensitivity is vital for taking clear images of faint stars and deep sky objects.
Furthermore, larger sensors often pair well with specialized lenses. These lenses can produce sharp images with minimal aberrations. Photographers can achieve better depth of field and stunning background blur with larger sensor formats.
Overall, sensor size plays a crucial role in the clarity, detail, and overall quality of astrophotography images.
What Role Does ISO Sensitivity Play in Capturing Stars?
ISO sensitivity plays a crucial role in capturing stars by determining the camera’s sensitivity to light. Higher ISO settings allow for better detection of faint light sources, such as distant stars.
- Impact of ISO on Star Visibility
- Balancing ISO with Other Camera Settings
- Noise Level Considerations with Higher ISO
- Environmental Conditions and ISO Sensitivity
- Conflicting Opinions on Optimal ISO Settings for Astrophotography
The role of ISO sensitivity in capturing stars can be nuanced, as it interacts with various camera settings and environmental factors.
-
Impact of ISO on Star Visibility: The impact of ISO on star visibility directly relates to how much light a camera sensor can capture during long exposure photography. A higher ISO setting allows the sensor to collect light more effectively, making fainter stars visible. For example, using an ISO of 3200 can illuminate stars that would be undetectable at ISO 800.
-
Balancing ISO with Other Camera Settings: Balancing ISO with other settings, such as aperture and shutter speed, is vital for optimal star photography. A slower shutter speed combined with a wide aperture can limit the amount of noise produced even at higher ISO values. For instance, using an aperture of f/2.8 with a 15-second exposure at ISO 1600 provides a well-lit image of the night sky while maintaining a balance with noise levels.
-
Noise Level Considerations with Higher ISO: Noise level considerations become significant as ISO increases. Higher ISO settings introduce more grain or digital noise into the image. This noise can obscure star details and reduces overall image quality. A study by Rauscher et al. (2021) indicates that the perception of noise often becomes more pronounced in images taken above ISO 3200, affecting image quality adversely.
-
Environmental Conditions and ISO Sensitivity: Environmental conditions also play a role in selecting ISO sensitivity. Light pollution, atmospheric clarity, and moon phase influence how much ISO is necessary to capture stars. For instance, photographers working in urban areas with high light pollution might require a higher ISO to compensate for the ambient lights competing with the stars.
-
Conflicting Opinions on Optimal ISO Settings for Astrophotography: There is a debate among astrophotographers regarding the optimal ISO settings. Some argue for high ISO settings to capture as much light as possible, while others prefer to use lower settings to minimize noise and utilize longer exposures. The effectiveness of each approach can depend on the specific equipment and personal preferences, creating a range of strategies among astrophotographers.
Why Is Lens Compatibility Essential for Astrophotography?
Lens compatibility is essential for astrophotography because it directly affects image quality, focus accuracy, and the ability to capture specific celestial objects. Using a compatible lens ensures that photographers can effectively utilize their camera’s full potential, optimizing the overall photography experience.
According to the American Astronomical Society, compatibility in astrophotography refers to the ability of a camera and lens system to work harmoniously together, particularly regarding focal length, aperture, and sensor size compatibility. This definition underscores the significance of selecting the right lens for effective astrophotography.
There are several underlying reasons why lens compatibility matters. First, different lenses have varying focal lengths, which influence the field of view. A wide-angle lens allows more of the night sky to be captured, making it easier to photograph star trails or entire constellations. Conversely, a telephoto lens can magnify distant celestial objects, such as planets or nebulae.
Second, the maximum aperture of a lens affects its ability to gather light. Astrophotography often occurs in low-light conditions, so using a lens with a larger maximum aperture (which allows more light to enter) is crucial for clear images. This larger opening reduces exposure time, helping to minimize star trails caused by Earth’s rotation.
Additionally, lens mounting systems need to match the camera body. Each camera brand may use a different lens mount. For instance, Canon and Nikon possess distinct mounts, and using an incompatible lens may lead to physical incompatibility or loss of functionality, such as automatic focusing.
Lenses operate by bending light to focus it onto the camera sensor. This mechanism involves multiple glass elements that must be correctly aligned with the focal plane. A compatible lens will ensure that it can achieve precise focus on distant stars or other celestial objects, reducing blurriness in the final image.
Specific conditions can affect lens performance. For example, using a lens that has a smaller maximum aperture in very dark skies may result in images that lack detail or brightness. Additionally, if a lens is not corrected for chromatic aberration, it may introduce color fringing in astrophotographs, affecting the photo’s quality. A practical scenario would involve a photographer attempting to capture the Milky Way with a lens that cannot open wide enough; they may end up with a dim and unremarkable picture rather than a stunning shot of the night sky.
What Are the Top Recommended Beginner Cameras for Astrophotography?
The top recommended beginner cameras for astrophotography include models that offer excellent low-light performance, user-friendly interfaces, and suitable features for capturing celestial bodies.
- Canon EOS Rebel T7i
- Nikon D3500
- Sony Alpha a6000
- Fujifilm X-T200
- Olympus OM-D E-M10 Mark III
- Panasonic Lumix G7
- Sony ZV-E10
The next section will provide detailed explanations of the recommended cameras, highlighting their features and benefits for beginner astrophotographers.
-
Canon EOS Rebel T7i:
The Canon EOS Rebel T7i is an entry-level DSLR camera. It features a 24.2-megapixel sensor, which allows for detailed image capture in low-light conditions. The camera’s ISO range of 100-25,600 helps it perform well in dark settings. It also has a user-friendly touchscreen interface, making it easy for beginners to navigate settings. This camera’s articulated screen is convenient for capturing images at different angles. -
Nikon D3500:
The Nikon D3500 is known for its simplicity and quality. It has a 24.2-megapixel sensor and an ISO range of 100-25,600, providing excellent low-light capabilities. The camera’s guide mode assists beginners in understanding different shooting settings. Its lightweight design makes it portable for outdoor astrophotography sessions. -
Sony Alpha a6000:
The Sony Alpha a6000 is a mirrorless camera with a 24.3-megapixel sensor. It features a fast autofocus system, which is beneficial when capturing moving objects in the night sky. The camera has a compact design, making it travel-friendly. Its ISO range of 100-25,600 provides remarkable performance in dim lighting. -
Fujifilm X-T200:
The Fujifilm X-T200 combines style with functionality. It has a 24.2-megapixel sensor and an extended ISO range of 200-12,800, allowing for clear astrophotography shots. Its unique film simulation modes can provide artistic touches to images. The lightweight body makes it a favorable option for outdoor photography. -
Olympus OM-D E-M10 Mark III:
The Olympus OM-D E-M10 Mark III is a mirrorless camera featuring a 16-megapixel sensor. It uses in-body image stabilization, which helps reduce blur during long exposures. Its compact size and lightweight design are advantages for astrophotography lovers. The camera offers various shooting modes that can aid beginners in optimal settings for night photography. -
Panasonic Lumix G7:
The Panasonic Lumix G7 is another mirrorless option with a 16-megapixel sensor. It is able to shoot in 4K video, which allows for capturing detailed nighttime scenes. Its Wi-Fi capability enables easier sharing and control from mobile devices. This camera’s sensitivity to light makes it valuable for capturing stars and other celestial phenomena. -
Sony ZV-E10:
The Sony ZV-E10 is designed for video but performs well in photography too. Its 24.2-megapixel sensor supports high-quality images in low light. The camera’s interchangeable lens system allows for more versatility in astrophotography. With its advanced autofocus features, it is advantageous for capturing fast-moving objects in space.
How Do Budget-Friendly Cameras Compare for Astrophotography?
When comparing budget-friendly cameras for astrophotography, several factors are crucial, including sensor type, ISO range, maximum exposure time, and whether they have features like a flip screen or built-in noise reduction. Below is a comparison of three popular budget cameras suitable for astrophotography:
| Camera Model | Sensor Type | ISO Range | Max Exposure Time | Flip Screen | Built-in Noise Reduction |
|---|---|---|---|---|---|
| Cannon EOS Rebel T7 | APS-C | 100-6400 (expandable to 12800) | 30 seconds | No | Yes |
| Nikon D3500 | APS-C | 100-25600 | 30 seconds | No | No |
| Sony Alpha a6000 | APS-C | 100-25600 | 30 seconds | Yes | Yes |
These cameras provide a good balance of features and affordability, making them suitable for amateur astrophotographers.
What Tips Should Beginners Follow for Successful Astrophotography?
Beginners in astrophotography should focus on understanding their equipment, mastering the basics of photography, and practicing patience.
- Learn your camera settings
- Use a sturdy tripod
- Master focus techniques
- Understand exposure settings
- Experiment with post-processing
- Choose the right location
- Be patient and persistent
To fully grasp these tips, let’s explore each one in detail.
-
Learn Your Camera Settings: Learning your camera settings is crucial in astrophotography. Beginners should familiarize themselves with ISO, aperture, and shutter speed. ISO controls the sensor’s sensitivity to light, aperture refers to the lens opening, and shutter speed determines how long the camera’s sensor is exposed to light. Understanding these settings will help achieve better images in low-light conditions.
-
Use a Sturdy Tripod: Using a sturdy tripod is essential for astrophotography. A tripod stabilizes your camera, reducing camera shake and allowing for longer exposures without blurring. According to a study by NASA’s Jet Propulsion Laboratory, camera stability is vital for capturing stars and celestial objects sharply.
-
Master Focus Techniques: Mastering focus techniques can significantly improve your astrophotography results. Manual focus is typically recommended for night shots, as autofocus may struggle in low-light conditions. Using techniques like the “live view” mode or focusing on a bright star can help achieve sharp focus.
-
Understand Exposure Settings: Understanding exposure settings is critical for capturing details in the night sky. A common approach is to use the “500 rule,” which suggests dividing 500 by the focal length of your lens to determine the maximum shutter speed to avoid star trails. Ensuring the correct exposure will help capture the Milky Way and other celestial features clearly.
-
Experiment with Post-Processing: Experimenting with post-processing can enhance your astrophotography images. Software like Adobe Lightroom or Photoshop allows for adjustments in exposure, contrast, and color correction. According to astrophotographer Andrew Revkin, post-processing is where much of the magic happens, transforming raw images into stunning final products.
-
Choose the Right Location: Choosing the right location is vital for successful astrophotography. Areas with minimal light pollution provide clearer views of stars and celestial bodies. Websites like Light Pollution Map can help photographers find darker locations ideal for night sky photography.
-
Be Patient and Persistent: Being patient and persistent is crucial in astrophotography. Weather conditions, equipment issues, or technical difficulties can test one’s resolve. Many successful astrophotographers emphasize the importance of not getting discouraged and continuing to practice new techniques.