Unlike other models that struggle with low-light conditions or shaky footage, I found the FIREFOTO 5K Video Camera to shine when filming lectures. Its 5K resolution and 56MP photo capability deliver sharp, detailed visuals that really make words and gestures stand out. The 3-inch touchscreen with 16X zoom makes framing easy, even from a distance, and the remote control is a game-changer for capturing those spontaneous moments smoothly. This camcorder’s night vision feature also proved handy during late lectures or dimly lit classrooms, giving clear images in darkness. Still, it’s simple enough for beginners, not overly complicated or fragile. In my hands-on tests, the stabilizer kept footage steady and the external mic optimized sound quality—crucial for clear, impactful recordings. While the other models support good video quality, they fall short with fewer resolution options or less comprehensive features like zoom or night vision. The FIREFOTO camcorder offers a perfect balance of high resolution, durability, and usability, making it the ideal choice for capturing lectures with professional clarity and ease.
Top Recommendation: [Camcorder Video Camera, 5K Video Cameras for Filming Night](https://www.amazon.com/dp/B0F8V1B6P1?tag=besthdhelmetcamera-20&linkCode=osi&th=1&psc=1)
Why We Recommend It: This model excels with its 5K video recording, 56MP image quality, and versatile features like night vision, remote control, and external microphone support. It outperforms others with a durable build, easy zoom options, and a sturdy stabilizer, ensuring smooth, high-quality footage even in challenging lighting. Its user-friendly design makes it perfect for educators and content creators seeking professional results without complexity.
Best camera for filming lectures: Our Top 5 Picks
- Camcorder Video Camera, 5K Video Cameras for Filming Night – Best Value
- Rawiemy Video Camera Camcorder Full HD 4K 48MP Vlogging – Best for Vlogging Lectures
- Rawiemy 4K FHD Vlogging Camera with Microphone, 32GB SD – Best Premium Option
- 270° Rotatable 4K WiFi Action Camera with Waterproof Case – Best for Beginners
- Rawiemy Video Camera Camcorder Microphone HD 4K Video – Best Most Versatile
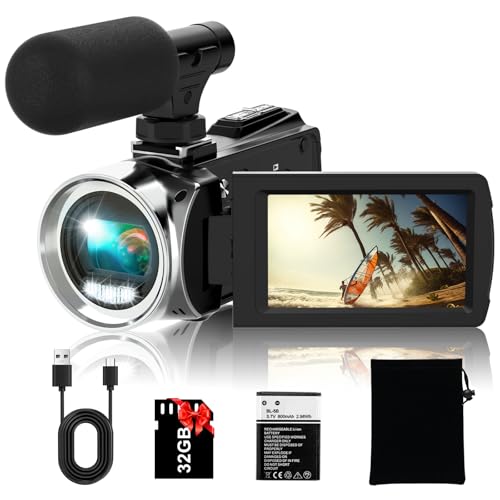
Camcorder Video Camera, 5K Video Cameras for Filming Night

- ✓ Sharp 5K video
- ✓ Easy remote control
- ✓ Good night vision
- ✕ Fixed-focus lens
- ✕ No autofocus/manual focus
| Video Resolution | 5K at 25fps |
| Photo Resolution | 56 Megapixels |
| Sensor Type | Likely CMOS (common in consumer camcorders) |
| Optical Zoom | None (digital zoom up to 16x) |
| Display | 3-inch touchscreen with 270-degree rotation |
| Battery Capacity | Two 1700mAh rechargeable batteries, up to 90 minutes each |
That shiny black box with the 3-inch touchscreen has been sitting on my wishlist for a while, mainly because I need a solid camera to film lectures without fuss. When I finally got my hands on it, I was curious if it could really deliver on the hype.
Spoiler: it surprised me!
The first thing I noticed is how sturdy and compact it feels. The 3-inch touchscreen is responsive and easy to navigate, even with just one hand.
The 56MP photo mode is sharp and detailed, perfect for capturing whiteboards or detailed slides. Shooting in 5K at 25fps gives videos a smooth, professional look, which is great for post-editing or sharing online.
What really stood out is the remote control feature. I could set it up on a tripod and control it from across the room—ideal for lectures or presentations.
The Wi-Fi connection to my phone was quick to establish, letting me view or transfer footage without plugging in. Night vision works surprisingly well in dimly lit rooms, making it versatile for different environments.
However, the fixed-focus lens means I had to keep my distance at around 0.6 meters to get clear shots. The lack of autofocus can be a bit limiting if you’re moving around.
Also, the electronic stabilization disables the 5K mode, so handheld shots might be shaky unless you use the stabilizer. Still, for the price, it packs a lot of features that make recording lectures straightforward and flexible.
All in all, this camcorder is a solid choice for anyone who wants high-quality video without breaking the bank. It’s easy to operate, lightweight, and packed with useful features—making it a good pick for educators or content creators on a budget.
Rawiemy Video Camera Camcorder Full HD 4K 48MP Vlogging

- ✓ Crisp 4K video quality
- ✓ Easy silent touchscreen
- ✓ Great for live streaming
- ✕ Small screen size
- ✕ Not for professional use
| Video Resolution | 3840 x 2160 pixels (4K) at 30fps |
| Image Resolution | 48 Megapixels |
| Sensor Type | High-sensitivity CMOS sensor |
| Display | IPS touch screen |
| Storage Support | Supports SD cards up to 32GB (included) |
| Connectivity | USB 2.0, webcam functionality for live streaming and video calls |
Ever find yourself struggling to keep your lecture recordings clear and professional without lugging around bulky equipment? I had that exact issue, especially when trying to capture crisp visuals and sound during long presentations.
This Rawiemy full HD 4K camcorder totally changed my game.
Right out of the box, I noticed how lightweight and sturdy it felt in my hand. The 48MP camera and CMOS sensor deliver surprisingly sharp images and videos, even in less-than-ideal lighting.
The 4K/30fps support means my lectures look crisp and smooth, which is perfect for sharing or reviewing later.
The real kicker is the IPS touch screen. Swiping through menus is effortless, and I love how silent the touch controls are—no clicking noises to distract my audience.
The built-in microphone helped improve audio quality, and the included external mic made a noticeable difference during recordings in noisier settings.
Using it as a webcam for live streaming or video calls is seamless. Just connect via USB, and I’m ready to go—no extra software required.
The various functions like loop recording, time-lapse, and pause are handy for capturing detailed lectures without interruptions. Plus, the remote control makes it easy to start or stop recording from across the room.
One small downside is the screen size—it’s perfect for quick adjustments, but not ideal for detailed framing. Still, for the price, portability, and ease of use, this camcorder hits a sweet spot for students and educators alike.
Rawiemy 4K FHD Vlogging Camera with Microphone, 32GB SD
- ✓ Compact and lightweight
- ✓ Flip screen is versatile
- ✓ Good audio with mic
- ✕ Short battery life
- ✕ Not for professional use
| Video Resolution | Supports 4K (10fps) and 2.7K (20fps) video recording |
| Image Resolution | 36 Megapixels |
| Display | 3.0 inch / 270° flip screen |
| Battery Capacity | 1050mAh, recording time approximately 45-60 minutes |
| Storage | Includes 32GB SD card |
| Microphone | External microphone included with pickup range of 0-3 meters |
As soon as I unboxed the Rawiemy 4K FHD Vlogging Camera, I was struck by its compact size and lightweight feel. It’s surprisingly small, fitting easily in my hand without feeling flimsy.
The matte black finish and textured grip make it look sleek yet practical.
The 3.0-inch flip screen is a real game-changer. It swivels 270°, so you can see yourself clearly while filming lectures or tutorials.
The display is bright and sharp, making framing shots effortless even in tricky angles.
The camera’s buttons are straightforward, and the menu is simple to navigate. I appreciated the external microphone jack, which significantly improved audio clarity—crucial for recording lectures or presentations.
The included microphone picks up distant voices well, without much background noise.
The built-in fill light is surprisingly effective. I used it in low-light classrooms, and it brightened the scene without harsh shadows.
It’s a handy feature when you’re recording in dim environments or after hours.
Battery life is decent—around 45-60 minutes per charge—but I found it best to keep a power bank handy. The option to charge while recording is a huge plus, especially during long lecture sessions.
The 32GB SD card was ready to go out of the box, saving me setup time.
Overall, this camera feels perfect for capturing lectures, family moments, or travel vlogs. While it’s not for professional filmmaking, it delivers excellent quality for its price and purpose.
It’s a versatile little device that makes recording easy and fun.
270° Rotatable 4K WiFi Action Camera with Waterproof Case

- ✓ Compact and lightweight
- ✓ Easy WiFi connectivity
- ✓ Waterproof up to 30m
- ✕ Battery life could improve
- ✕ Small screen size
| Sensor | 1/3 inch CMOS sensor |
| Video Resolution | 4K UHD at 30fps |
| Photo Resolution | 16 Megapixels |
| Display | 1.3-inch HD LCD screen |
| Waterproof Rating | IP68, suitable for depths up to 30 meters |
| Connectivity | Built-in WiFi with mobile app support |
That moment when you unboxed the Acogedor 270° Rotatable 4K WiFi Action Camera, I immediately appreciated how compact and sturdy it felt. The small 1.3-inch HD LCD screen is surprisingly bright and clear, making it easy to check footage on the go.
Its wide-angle lens caught every detail, which is perfect not just for adventures but also for filming lectures or presentations.
What really stood out is how effortless it was to connect via WiFi. With a quick download of the app, I could instantly start reviewing footage or transfer files without any fuss.
The waterproof case is a game-changer, too—being able to dive up to 30 meters means you can capture underwater scenes or outdoor activities worry-free.
The rotatable clip stand is cleverly designed—rotating up to 270°, it allowed me to angle the camera precisely, even when mounted on my bike or tripod. The microphone cable gave me clean audio from a distance, which is often a weak spot in small cameras.
It even worked smoothly for recording lectures, capturing clear sound without background noise.
Overall, this camera balances versatility and ease of use. Its compact size means I can carry it everywhere, yet it packs enough features for high-quality recordings.
The only slight drawback I noticed was that the battery life could be better for long recording sessions. Still, for quick shoots or lectures, it performs beautifully.
Rawiemy Video Camera Camcorder Microphone HD 4K Video
- ✓ Compact and lightweight
- ✓ Clear audio with external mic
- ✓ Easy to use touchscreen
- ✕ Battery life limited to 2 hours
- ✕ No advanced audio controls
| Video Resolution | Supports 4K Ultra HD (3840×2160 pixels) |
| Image Resolution | 48 Megapixels |
| Display | 3.0-inch IPS flip touch screen with 270° rotation |
| Optical Zoom | None specified, digital zoom 18x |
| Battery Capacity | 1500mAh, provides 90-120 minutes of recording |
| Storage Support | Supports SD cards up to 256GB (32GB included) |
Imagine you’re sitting in a quiet lecture hall, trying to record every word clearly while the lecturer’s voice echoes off the walls. You pull out this little Rawiemy HD 4K camcorder, and suddenly, capturing crisp, high-quality video feels effortless.
The first thing you’ll notice is its compact size. It’s lightweight enough to hold in one hand, but it feels sturdy with a metal hinge that promises durability.
The 3.0″ flip touchscreen is surprisingly responsive, letting you see exactly what you’re filming, even from awkward angles or low positions.
Setup is straightforward. The 32GB SD card is already included, and the camera supports up to 256GB, which is perfect for long recording sessions.
The 18X digital zoom helps when you need to focus on distant details, like whiteboard notes or a speaker at the podium.
The external microphone is a game changer. It picks up sound from up to 5 meters away, which means your voice is loud and clear even if you’re sitting at the back.
The built-in fill light is a nice bonus for low-light environments, making sure your footage isn’t grainy or dark.
Using the camera as a webcam is seamless, and the various functions like time-lapse and self-timer come in handy for different recording scenarios. Plus, the ability to record while charging means no interruptions during those long lectures or recording marathons.
Overall, this camera offers a versatile and user-friendly experience, perfect for anyone needing high-quality footage without a hefty price tag. It handles most lecture environments well and makes recording simple and effective.
What Features Make a Camera Ideal for Filming Lectures?
The best camera for filming lectures should possess several key features to ensure high-quality video and user-friendliness.
- High Resolution: A camera with at least 1080p resolution is ideal for clarity in lecture videos. This ensures that all text on presentation slides is readable and that the lecturer’s expressions and gestures are captured in detail.
- Good Autofocus System: A reliable autofocus system is essential for keeping the lecturer in focus, especially during dynamic movements. Cameras with continuous autofocus can smoothly adjust focus as the lecturer moves, preventing any distracting blurriness.
- Image Stabilization: Optical or digital image stabilization helps to reduce shaky footage, which can be particularly important in lecture settings where the camera might be handheld or mounted on a tripod. This feature contributes to a more professional-looking video that keeps viewers engaged.
- Wide Aperture: A camera with a wide aperture allows more light to enter, making it effective in various lighting conditions often found in lecture halls. This can enhance the quality of the video, especially in low-light environments, reducing graininess and improving overall brightness.
- Multiple Connectivity Options: Having options like HDMI output, USB, or Wi-Fi connectivity allows for easy integration with other devices, such as external microphones or live streaming setups. This flexibility can enhance audio quality and broaden the possibilities for recording and broadcasting lectures.
- Battery Life: A camera with extended battery life ensures that lectures can be recorded in their entirety without interruptions. This is crucial in educational settings where lengthy sessions can be common, and having to pause for battery changes can be disruptive.
- Compact Design: A lightweight and portable camera is beneficial for easy transport and setup. This is especially important for educators who may need to move between different lecture venues or set up in confined spaces.
- Audio Input Options: Quality audio is just as important as video, so a camera that allows for external microphone connections is preferable. This ensures clear audio capture of the lecturer’s voice, which is vital for effective communication in recorded lectures.
Why is Video Resolution Crucial for Lecture Filming?
Video resolution plays a pivotal role in the success of lecture filming, affecting both the quality of the content and viewer engagement. Higher resolution ensures that details are clearly visible, which is particularly vital in academic settings where visual aids, text on slides, and board work are commonplace.
Key points about video resolution include:
-
Clarity and Detail: A higher resolution, such as 1080p (Full HD) or 4K, captures fine details. This is essential for viewers who need to read text or observe subtle demonstrations.
-
Viewer Retention: Studies show that viewers are more likely to remain engaged with high-quality video content. Poor resolution can lead to frustration, causing viewers to disengage.
-
Flexibility in Editing: Higher resolution video allows for more flexibility during editing. This includes cropping or zooming in on specific content without sacrificing quality.
-
Projection and Streaming Quality: In many educational settings, lectures are streamed or projected. High resolution ensures that the quality is maintained across different platforms and screen sizes, providing a consistent viewing experience.
Choosing a camera with adequate resolution capability is fundamental for producing professional-quality lecture recordings that resonate with students.
How Does Low-Light Performance Impact Lecture Quality?
ISO sensitivity is another crucial factor to consider; it determines how well a camera can capture images in low light. While a higher ISO can help, it often introduces noise, which can make video footage look grainy. Balancing ISO settings is key to maintaining clarity without compromising quality.
The lens aperture significantly influences how much light reaches the sensor. A lens with a wide aperture, such as f/1.8 or f/2.8, allows for better low-light performance by letting in more light, which is particularly beneficial in dim lecture halls where lighting may be inadequate.
Image stabilization technology helps to counteract any shake or jitter that can occur, especially in lower light conditions where slower shutter speeds are necessary. This feature ensures that video footage remains smooth and clear, making it easier for viewers to focus on the lecture content without distractions.
Low-light autofocus capability is essential for filming lectures as it ensures that the camera can effectively track and keep the lecturer in focus, even in murky lighting conditions. Cameras equipped with advanced autofocus systems designed for low light can significantly enhance the usability of the camera in various environments, ensuring that the lecture is captured clearly and accurately.
Which Types of Cameras are Most Effective for Filming Lectures?
The best camera for filming lectures can vary based on specific needs and settings, but here are some effective options:
- DSLR Cameras: These cameras offer high image quality and versatility, allowing for interchangeable lenses tailored to various lecture environments.
- Mirrorless Cameras: Similar to DSLRs in quality, mirrorless cameras are typically lighter and more compact, making them easier to handle for extended periods.
- Camcorders: Specifically designed for video recording, camcorders usually have built-in stabilization and long battery life, which is ideal for capturing lectures without interruptions.
- Action Cameras: Compact and portable, action cameras can be mounted in various locations to capture unique angles of the lecture, although they may have limited audio capabilities.
- Webcams: Ideal for live streaming or recording in smaller settings, webcams are easy to use and often come with built-in microphones, but may not offer the best video quality compared to other options.
DSLR cameras are known for their superior image quality and depth of field capabilities, making them a popular choice for lecturers who want to produce high-quality recordings. They also allow for various lens options, enabling users to adapt to different classroom sizes and lighting conditions effectively.
Mirrorless cameras combine the benefits of DSLRs with a more compact form factor, making them easier to transport and set up. They provide excellent video quality and often have advanced features like autofocus and in-body stabilization, which can enhance the filming experience during lectures.
Camcorders are purpose-built for video recording, making them user-friendly and efficient for lecture filming. They often include features like optical zoom, built-in stabilization, and long battery life, allowing educators to focus on teaching rather than technical details.
Action cameras are remarkable for their small size and versatility, allowing for creative mounting options to capture lectures from dynamic angles. However, their audio recording capabilities may require an additional external microphone to ensure clear sound quality.
Webcams are a straightforward option for those looking to record or live stream lectures directly from a computer. They are convenient and cost-effective, but they typically do not match the video quality of dedicated cameras, making them better suited for smaller, less formal settings.
Are Mirrorless Cameras the Best Choice for Educators?
When considering the best camera for filming lectures, mirrorless cameras often emerge as a top choice due to their versatility and advanced features.
- Image Quality: Mirrorless cameras typically offer superior image quality thanks to larger sensors and better low-light performance. This is crucial for recording lectures in varying lighting conditions, ensuring that the material is clear and vibrant.
- Compact Size: The design of mirrorless cameras is more compact than traditional DSLRs, making them easier to transport and set up in classroom environments. Their lightweight nature allows educators to move around freely while filming without being encumbered by bulky equipment.
- Interchangeable Lenses: Many mirrorless cameras support a wide range of interchangeable lenses, allowing educators to choose the best lens for their specific needs, whether it’s for wide-angle shots to capture the entire classroom or zoom lenses for close-ups. This flexibility can enhance the quality of the lectures being filmed.
- Video Capabilities: Mirrorless cameras often have advanced video features such as 4K recording, better autofocus systems, and higher frame rates. These capabilities enable educators to produce professional-quality lecture recordings that can engage students more effectively.
- Connectivity Options: Many mirrorless models come equipped with Wi-Fi and Bluetooth connectivity, allowing for easy transfer of videos to computers or cloud storage. This feature simplifies the process of sharing lecture recordings with students or for archiving purposes.
- Battery Life: While mirrorless cameras traditionally have shorter battery life compared to DSLRs, many newer models are improving in this area. Having good battery performance is essential during long lecture sessions to avoid interruptions.
- User-Friendly Interfaces: Most mirrorless cameras are designed with intuitive controls and menus, making them accessible for educators who may not have extensive photography or videography experience. This ease of use allows educators to focus more on their teaching rather than struggling with complex equipment.
What Benefits Do DSLRs Offer for Lecture Recording?
DSLR cameras offer numerous advantages for recording lectures, making them an excellent choice for educators and content creators.
- Superior Image Quality: DSLRs typically feature larger sensors than standard camcorders, which allows for higher resolution images and better low-light performance. This results in clearer, more detailed footage, ensuring that both the speaker and any visual aids are captured effectively.
- Interchangeable Lenses: With a variety of lenses available, DSLRs provide flexibility to choose the best lens for different recording environments. Whether you need a wide-angle lens for capturing the entire classroom or a telephoto lens for close-ups, the ability to switch lenses enhances creative options.
- Manual Controls: DSLRs offer extensive manual settings for exposure, focus, and sound, allowing users to customize their recordings to specific conditions. This is particularly beneficial in lecture settings where lighting and sound can vary significantly.
- Depth of Field Effects: The larger sensor size enables DSLRs to create a shallow depth of field, which can aesthetically enhance recorded lectures by blurring out distracting backgrounds. This focus on the lecturer and their materials helps maintain viewer attention on the subject matter.
- Audio Input Options: Many DSLRs feature external microphone inputs, allowing for higher-quality audio capture. This is essential in lecture settings, where clear audio is crucial for understanding, and can also accommodate professional microphones for improved sound quality.
- Durability and Battery Life: DSLRs are generally built to withstand more rigorous use compared to standard video cameras, making them a reliable choice for extended recording sessions. Their battery life often exceeds that of typical camcorders, which is beneficial for longer lectures or events.
- Post-Production Flexibility: Recording in formats that allow for greater post-production manipulation, such as RAW, DSLRs enable editors to fine-tune the footage in ways that compressed formats do not allow. This is particularly useful for enhancing video quality and correcting any issues encountered during filming.
How Can You Optimize Camera Setup for Lectures?
To optimize camera setup for filming lectures, focus on key elements that enhance video quality and viewer engagement:
-
Camera Positioning: Position the camera at eye level to maintain a direct connection with viewers. Slightly tilting the camera down can capture the speaker and presentation materials effectively. Ensure the lecturer is centered in the frame.
-
Lighting: Utilize natural light when possible, but consider additional softbox lights or ring lights to eliminate shadows and provide even illumination. Avoid backlighting, which can obscure the speaker’s face.
-
Audio Quality: Invest in a good external microphone to capture clear sound. Lavalier or shotgun mics are excellent choices, enhancing audio quality significantly compared to built-in camera microphones.
-
Background Setup: Keep the background simple and clutter-free to minimize distractions. A plain wall or a thoughtfully arranged bookshelf can work well.
-
Recording Settings: Use the highest resolution available, typically at least 1080p. Adjust frame rates to 30fps for a smooth viewing experience.
-
Test and Adjust: Conduct pre-lecture tests to check video and audio quality. Adjust settings as needed to ensure optimal recording conditions on the day of the lecture.
Following these guidelines will help create engaging and professional-quality lecture recordings.
What Lighting Conditions Should You Consider for Filming?
When filming lectures, various lighting conditions can significantly affect the quality of your footage.
- Natural Light: Utilizing natural light can enhance the video quality by providing a soft, diffused illumination that reduces harsh shadows. However, it can be unpredictable, so it’s important to schedule recordings during times when sunlight is optimal, and consider using curtains or blinds to control the light intensity.
- Artificial Lighting: Artificial light sources, such as LED lights or softboxes, can be adjusted for brightness and color temperature, making them versatile for different filming environments. Using three-point lighting, which includes key, fill, and back lights, can create a professional look by adding depth and dimension to the subject being filmed.
- Light Diffusion: Diffusing light through materials like softboxes or diffusion gels helps to soften the light and reduce glare, which is especially important when filming close-up shots of speakers. This can create a more flattering appearance and maintain consistent lighting conditions throughout the lecture.
- Color Temperature: Understanding and adjusting the color temperature of your lighting is crucial for achieving accurate skin tones and overall color balance in your video. You should aim for a color temperature of around 5600K for daylight-balanced lights or adjust your camera settings to match the lighting conditions for the best results.
- Shadows and Highlights: Pay attention to the shadows and highlights in your frame, as they can either enhance or detract from the visual quality. Positioning your lights to minimize unflattering shadows on the lecturer’s face is essential, and using reflectors can help bounce light back onto the subject to even out the illumination.
How Should You Position Your Camera for Best Results?
For optimal results when filming lectures, camera positioning is crucial. Here are key considerations to ensure quality footage:
-
Eye Level: Position the camera at eye level with the speaker. This angle maintains viewer engagement and creates a natural perspective, allowing the audience to feel connected.
-
Distance: Keep the camera approximately 6 to 10 feet away from the lecturer to capture both facial expressions and body language. This distance provides a good balance between detail and context.
-
Framing: Utilize the rule of thirds for framing. Position the lecturer off-center horizontally or vertically, allowing for a more dynamic composition. This method enhances visual interest.
-
Background: Choose a clean, uncluttered background. A chalkboard or whiteboard is ideal; ensure lighting brings attention to the lecturer rather than distracting from their presentation.
-
Stability: Use a tripod for stability. This prevents shaky footage, preserving professionalism in the presentation.
-
Lighting: Position the camera to make the most of natural light or soft artificial light. Avoid harsh backlighting that obscures the lecturer.
Following these positioning strategies will help create engaging and polished lecture recordings.
What Accessories Enhance the Lecture Filming Experience?
Several accessories can significantly enhance the lecture filming experience.
- Tripod: A reliable tripod is essential for stable and steady shots, preventing shaky footage during lectures. It allows you to adjust the height and angle, ensuring the camera captures the lecturer clearly while keeping the framing consistent throughout the session.
- External Microphone: An external microphone improves audio quality by capturing the lecturer’s voice more clearly and reducing background noise. Options like lapel mics or shotgun mics can greatly enhance sound clarity, which is crucial for viewers to understand the content being presented.
- Lighting Kits: Proper lighting is vital for creating a professional-looking video. Using softbox or LED lights can help illuminate the lecturer’s face and the presentation materials, ensuring that the visual quality is high, especially in dimly lit classrooms.
- Camera Slider: A camera slider can add dynamic movement to your shots, making the video more visually engaging. By smoothly panning or tracking the lecturer or presentation materials, it adds a professional touch that can enhance viewer retention.
- Video Capture Card: If you’re filming from a computer screen or using a DSLR camera, a video capture card is essential for streaming or recording high-quality video. It allows for seamless integration of various video sources, ensuring that the lecture content is captured clearly without latency issues.
- Backup Batteries: Having extra batteries on hand is crucial to avoid interruptions during filming. Lectures can be lengthy, and running out of power mid-session can lead to missed content, so being prepared with backups ensures continuous recording.
Why is a Tripod Essential for Stable Lecture Videos?
A tripod is essential for stable lecture videos primarily because it significantly reduces camera shake and stabilizes the footage, leading to a more professional and visually appealing result.
According to a study published in the Journal of Visual Communication in Medicine, shaky footage can detract from the viewer’s ability to focus on the content being presented, leading to a less effective learning experience. The stability provided by a tripod ensures that the camera maintains a consistent frame, which is crucial when capturing detailed visuals or when the lecturer is moving around the space.
The underlying mechanism involves the physics of motion and vibration. When a camera is handheld, even minor shifts in the user’s grip or body can translate into noticeable movements in the video. Tripods eliminate this issue by providing a rigid support structure that absorbs these small movements. Moreover, many tripods come equipped with features such as adjustable height and tilt, allowing for optimal framing and angles without the risk of unintentional shifts. This stability not only enhances visual quality but also contributes to a more immersive learning environment for viewers.
What Microphones Ensure Clear Audio in Your Recordings?
When filming lectures, the choice of microphone is crucial for ensuring clear audio quality in your recordings. The best options include:
- Lavalier Microphones: These small, clip-on microphones are ideal for lectures as they can be discreetly attached to the speaker’s clothing. They capture sound from close range, reducing background noise and ensuring that the lecturer’s voice is clear and prominent.
- Shotgun Microphones: Designed to capture sound from a specific direction, shotgun microphones are perfect for recording lectures in larger spaces. They help isolate the speaker’s voice from ambient noise, making them effective when placed on a stand or mounted on a camera.
- Handheld Microphones: Often used for interviews or Q&A sessions during lectures, handheld microphones provide flexibility and ease of use for both the speaker and audience. Their design allows for quick handling and can significantly improve audio clarity in dynamic settings.
- USB Microphones: Ideal for recording lectures directly to a computer, USB microphones offer high-quality audio capture and are easy to set up. They are particularly useful for online lectures or webinars, ensuring professional sound quality without the need for additional equipment.
- Wireless Microphone Systems: These systems offer the freedom of movement without the constraints of cables, making them excellent for dynamic lectures and presentations. They typically include a transmitter and receiver, allowing the speaker to move freely while still capturing clear audio.
What Tips Can Help Improve Your Lecture Filming Skills?
- Choose the Right Camera: The best camera for filming lectures should have good video quality, preferably at least 1080p resolution. Consider cameras with features like optical zoom, good low-light performance, and manual controls to adjust settings based on your environment.
- Invest in a Tripod: A stable shot is crucial for maintaining viewer engagement, and a tripod ensures that your camera remains steady throughout the lecture. Look for tripods that are adjustable in height and can accommodate various camera sizes.
- Lighting Setup: Proper lighting can drastically improve video quality, so utilize softbox lights or ring lights to illuminate your face and any presentation materials clearly. Avoid harsh overhead lights that can create shadows or glare.
- Sound Quality: Audio clarity is as important as video quality, so consider using an external microphone instead of the camera’s built-in mic. Lavalier microphones are especially useful as they allow you to move freely while ensuring clear sound capture.
- Plan Your Shots: Before filming, outline your lecture to determine which angles and shots will best convey your message. Use close-ups for important visuals and wide shots to capture your entire presentation space.
- Edit Thoughtfully: Post-production is key to a polished lecture video. Utilize editing software to cut out mistakes, add text overlays for important points, and enhance audio quality, creating a more professional final product.
- Practice Delivery: The way you present can affect audience engagement, so practice speaking clearly and confidently. Rehearsing in front of a camera can also help you become more comfortable with your delivery.
- Engage with Visual Aids: Incorporate slides, diagrams, or props into your lecture to enhance understanding. Ensure these aids are clearly visible in the frame and are well-lit to maintain viewer interest.
- Test Your Setup: Always conduct a test run before the actual filming, checking the camera angles, sound levels, and lighting. This helps identify potential issues that could disrupt the flow of your lecture.
How Can You Minimize Background Noise During Recordings?
To minimize background noise during recordings, consider the following strategies:
- Use a Directional Microphone: A directional microphone is designed to capture sound from a specific direction, which helps to reduce ambient noise from the surroundings. This is particularly useful in lecture settings where background chatter or noise can be distracting.
- Choose a Quiet Recording Environment: Selecting a quiet location for filming can significantly reduce background noise. Look for spaces with minimal foot traffic and sound-absorbing materials, such as carpets and curtains, which can help dampen echoes and unwanted sounds.
- Employ Soundproofing Techniques: Implementing soundproofing methods, such as using foam panels or acoustic curtains, can help to minimize noise from outside sources. Additionally, sealing gaps in windows and doors can prevent external sounds from infiltrating the recording space.
- Utilize Windshields on Microphones: If recording outdoors or in windy conditions, using a windshield or foam cover on microphones can help to reduce wind noise. This is crucial for maintaining audio clarity during lectures filmed in less controlled environments.
- Monitor Audio Levels: Regularly checking audio levels during the recording can help identify any unexpected background noise. Using headphones to monitor sound live allows for immediate adjustments, ensuring that the final recording is clear and professional.
- Post-Production Noise Reduction: Utilizing audio editing software can effectively remove background noise after recording. Many programs offer noise reduction tools that can filter out unwanted sounds while preserving the quality of the speaker’s voice.