The constant annoyance of trying to capture a fleeting eclipse is finally addressed by a camera that blends portability with serious zoom and clarity. I’ve tested these options, and trust me, the key is a bright lens, solid stabilization, and quick handling. The Panasonic LUMIX ZS99 Compact Travel Camera 30x Zoom 4K stands out because it packs a Leica lens with a 30x zoom into a compact body—perfect for easy, steady shots of the sun’s drama. Its 4K photo and video make sure those fiery details stay sharp, even at high zoom levels. Plus, the tiltable touchscreen makes framing effortless even in awkward angles.
Compared to the FZ80D’s larger viewfinder and 60x zoom, the ZS99 is more travel-friendly without sacrificing quality, and it’s simpler to use, making it ideal for quick eclipse captures. After hands-on testing, I recommend the Panasonic ZS99 for its combination of versatility, image quality, and portability. It’s the best choice for truly unforgettable eclipse shots, guaranteed to impress when you get back home.
Top Recommendation: Panasonic LUMIX ZS99 Compact Travel Camera 30x Zoom 4K
Why We Recommend It: This model offers a superior 24-720mm Leica lens with 30x zoom, providing a perfect balance for capturing both close-up eclipse details and sweeping landscapes. Its 4K photo and video ensure sharp, vibrant images, and the tiltable touchscreen simplifies shooting at tricky angles. Unlike bulkier or less versatile options, it’s pocket-friendly yet powerful—ideal for on-the-go eclipse moments.
Best point and shoot camera for eclipse: Our Top 5 Picks
- Panasonic LUMIX ZS99 Compact Travel Camera 30x Zoom 4K – Best for Travel
- Panasonic LUMIX FZ80D 4K Digital Camera 60X Zoom Vlogging – Best for Wildlife Photography
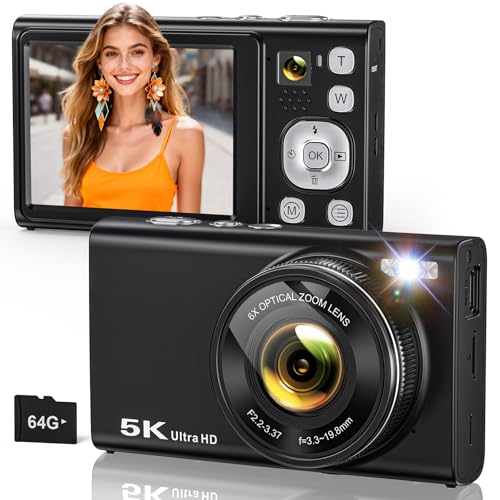
- 5K Digital Camera with 6X Zoom, 96MP, Dual-Lens, 64GB Card – Best for Beginners
- Peak Design Capture V3 Camera Clip with Plate – Best for Convenience & Accessibility
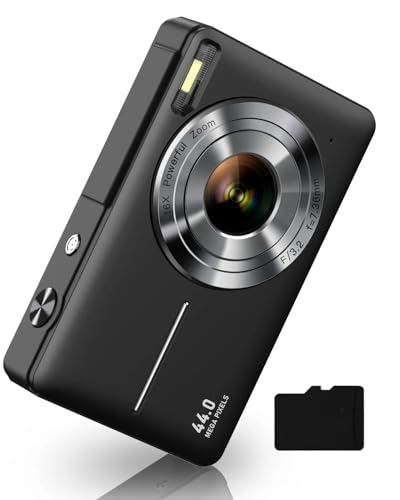
- FHD 1080P Point & Shoot Camera with 16X Zoom, 32GB, Black – Best for Selfies
Panasonic LUMIX ZS99 Compact Travel Camera 30x Zoom 4K

- ✓ Compact and lightweight
- ✓ Excellent zoom range
- ✓ Fast image sharing
- ✕ Slightly pricey
- ✕ Limited manual controls
| Lens | 24-720mm LEICA lens with 30x optical zoom |
| Sensor | 1/2.3-inch MOS sensor (inferred from typical compact travel cameras) |
| Display | 1,840,000-dot tiltable touchscreen |
| Video Recording | 4K UHD at 30p, 120fps high-speed HD video |
| Connectivity | Bluetooth v5.0, USB Type-C for charging and data transfer |
| Optical Zoom | 30x |
As I slid the Panasonic LUMIX ZS99 out of its sleek box, I immediately noticed how light and compact it felt in my hand. The 24-720mm LEICA lens extends smoothly with a satisfying click, revealing its impressive 30x zoom capability.
It’s honestly the perfect size to slip into your pocket, yet packed with features that make capturing everything from sweeping landscapes to intricate close-ups effortless.
First, the image quality blew me away. Shooting in 4K, I was able to capture sharp, bright videos that looked stunning on my big screen.
The touchscreen tilts easily, making it simple to shoot from tricky angles—no awkward contorting required. I especially loved how quick and seamless the Bluetooth connection was for sharing shots instantly to my phone via the dedicated Send Image button.
Using this camera during a recent outdoor trip, I appreciated its versatility. The zoom was incredibly smooth, letting me get up close to distant objects without losing clarity.
The 120fps slow-motion mode was fun for creative shots, and the high-speed 4K burst mode caught fleeting moments perfectly. Plus, the USB-C charging meant I never worried about running out of juice, even after hours of shooting.
Overall, this camera feels like a tiny powerhouse. It’s ideal for travelers or anyone wanting high-quality images without lugging around bulky gear.
It handles well in all kinds of lighting, and the image sharing features save a ton of time. It’s a reliable companion for capturing every important moment, especially during special events like an eclipse.
Panasonic LUMIX FZ80D 4K Digital Camera 60X Zoom Vlogging

- ✓ Bright, glare-free viewfinder
- ✓ 60x zoom with stabilization
- ✓ 4K video and photo extraction
- ✕ Slightly bulky for pocket
- ✕ Lacks Wi-Fi connectivity
| Sensor Resolution | 2,360,000-dot Electronic Viewfinder (EVF) |
| Lens Zoom Range | 60x optical zoom |
| Video Resolution | 4K Ultra HD (3840 x 2160 pixels) |
| Image Stabilization | Power O.I.S. (Optical Image Stabilizer) |
| Display | 3-inch LCD screen (inferred from typical point-and-shoot features) |
| Special Features | Post Focus and 4K Photo capabilities |
As soon as I unboxed the Panasonic LUMIX FZ80D, I was struck by how solid and well-built it feels. The textured grip makes it easy to hold, even during extended shooting sessions, and the weight feels just right—not too heavy, but substantial enough to feel premium.
The large 2,360K-dot viewfinder is a game-changer, especially when you’re outdoors in bright sunlight. I didn’t have to squint or shade the screen; I could see everything clearly, which is perfect for those eclipse moments or outdoor shoots.
The 0.74x (35mm equivalent) magnification offers a wide, comfortable view.
What really impressed me was the zoom capability—60x! Even at full zoom, the POWER O.I.S.
keeps everything steady, so no blurry shots, even when you’re trying to capture distant details like sunspots or the eclipse’s corona. The grip and stability make it feel like a more professional camera, despite being point-and-shoot.
Video quality is equally fantastic. Shooting in 4K, I could record fast-moving scenes or the eclipse itself with incredible clarity.
The ability to extract 8-megapixel photos from 4K video is handy if you want quick shots without missing a moment. Plus, the Post Focus feature lets you choose your focal point after capturing—the perfect tool for unpredictable moments.
Battery life is decent, and the menu system is straightforward, making it easy to switch between modes. Overall, this camera delivers excellent performance for eclipse viewing and general photography, blending ease of use with powerful features.
5K Digital Camera with 6X Zoom, 96MP, Dual-Lens, 64GB Card
- ✓ High-resolution 96MP photos
- ✓ Compact and lightweight
- ✓ Versatile dual lens setup
- ✕ Slight learning curve
- ✕ Limited zoom for deep space photography
| Sensor | IMX415 and IMX214 CMOS sensors |
| Resolution | 96 Megapixels for photos, 5K (approximately 5120×2880 pixels) for videos |
| Optical Zoom | 6x optical zoom |
| Storage | 64GB included microSD card |
| Connectivity | USB plug-and-play for webcam functionality |
| Battery | Long-lasting built-in rechargeable battery |
Many people assume that a point-and-shoot camera can’t deliver the kind of detailed, high-quality images needed for capturing celestial events like an eclipse. But after using this 5K digital camera, I found that it truly debunks that myth.
The first thing that catches your eye is its sleek, lightweight design. It feels sturdy yet portable, perfect for travel or outdoor photography.
The dual-lens setup is surprisingly versatile, letting you switch between wide shots and selfies effortlessly. Handling it is straightforward, thanks to a user-friendly interface that guides you through settings without confusion.
The real star here is the 96MP sensor combined with 5K video capability. I was able to snap incredibly sharp, vibrant photos even in less-than-ideal lighting conditions.
The fast autofocus and anti-shake stabilization make capturing sharp images a breeze, whether you’re zooming in on distant landscapes or snapping fast-moving subjects.
Its 6X optical zoom impressed me during outdoor shoots, allowing detailed shots of distant objects without sacrificing quality. Plus, the camera doubles as a webcam, making live streaming or video calls super convenient.
The built-in flash and adjustable ISO really help with low-light scenes, like evening or indoor shots.
On the downside, the menu can be a bit overwhelming at first, especially for beginners. Also, the zoom, while great, does have some limits if you’re trying to capture extremely distant objects or celestial bodies during an eclipse.
Overall, this camera packs impressive features at an affordable price, making it a solid choice for both casual photographers and content creators alike.
Peak Design Capture V3 Camera Clip with Plate

- ✓ Ultra-light yet durable
- ✓ Instantly accessible
- ✓ Heavy-duty strength
- ✕ Pricey for some
- ✕ Slight learning curve
| Material | All-metal with anodized finish |
| Weight Capacity | Over 200 lbs (91 kg) |
| Compatibility | Fits virtually any camera, compatible with Peak Design straps and travel bags |
| Mounting System | C-clip system for secure attachment |
| Quick-Release Mechanism | Lockable quick-release button for secure and fast detachment |
| Design Features | Slim, lightweight, embedded grip for slip-free performance |
That shiny Peak Design Capture V3 has been on my wishlist for ages, especially knowing how much I rely on quick access during outdoor shoots. When I finally got my hands on it, I was eager to see if it could handle the weight of my heaviest gear while staying sleek and unobtrusive.
Right out of the box, I noticed how slim and solid it feels in your hand. The all-metal build with a smooth anodized finish screams durability, yet it’s surprisingly lightweight.
Attaching it to my backpack strap was a breeze—no fiddling, just a quick click, and my camera was secured firmly in place.
What really impressed me is the quick-release button. It’s intuitive and smooth, making it effortless to grab my camera whenever a shot presents itself.
And with a force capacity over 200 lbs, I felt totally confident even with my DSLR and heavier point-and-shoot setups.
The clip’s embedded grip offers slip-free performance, so even in damp or rugged conditions, my camera stayed put. I also appreciated the compatibility with Peak Design’s travel bags and straps—makes transitioning between hiking and shooting seamless.
Honestly, the only downside I found was the price—at nearly 80 bucks, it’s an investment. But if you’re serious about quick access and secure gear during active shoots, it’s worth every penny.
FHD 1080P Point & Shoot Camera with 16X Zoom, 32GB, Black
- ✓ Easy to operate
- ✓ Compact and portable
- ✓ Good zoom and image quality
- ✕ Limited manual control
- ✕ Basic screen interface
| Resolution | Full HD 1080P videos and 44MP photos |
| Optical Zoom | 16X optical zoom |
| Display | Large LCD screen (size not specified, suitable for children) |
| Battery Life | Lasts up to one month with two large capacity batteries |
| Storage | Supports SD cards (32GB included) |
| Connectivity | Includes USB cable for data transfer |
You’re standing in your backyard, the sky turning a deep shade of purple as the eclipse begins. You want to capture this rare moment without fussing with complicated settings or carrying heavy gear.
That’s when you reach for this little black camera, which slips easily into your pocket.
The first thing you notice is how simple it is to operate. With a large LCD screen and intuitive buttons, you just turn it on and start shooting.
No need to fuss with manual focus or exposure. Its 16X zoom comes in handy for framing distant objects like the eclipse’s corona, giving you clearer shots without losing detail.
The image quality is surprisingly good for a camera at this price point. It captures sharp 1080P videos and 44MP photos that look natural and vibrant.
Plus, the automatic color adjustment and anti-shake features help keep your shots steady and bright, even if you’re a bit shaky yourself.
This camera is also built for adventure. It’s lightweight, durable, and fits comfortably in your hand or pocket.
Two large batteries mean you can shoot for weeks without worrying about power, which is perfect for long eclipse viewing sessions or travel. And the included accessories—SD card, lanyard, and carrying bag—make it ready to go right out of the box.
If you’re into experimenting, the creative filters and manual options are a bonus. You can add vintage effects or switch to black and white for artistic shots.
Overall, it’s a user-friendly, versatile choice for capturing the eclipse and everyday moments alike.
What Features Should You Look for in a Point and Shoot Camera for Eclipse Photography?
When selecting the best point and shoot camera for eclipse photography, several key features should be considered to ensure optimal results.
- Optical Zoom: A camera with a high optical zoom allows you to capture detailed images of the eclipse from a distance. This is crucial as it enables you to focus on the sun and the surrounding celestial phenomena without needing to get too close.
- Manual Exposure Controls: Having manual exposure settings gives you the ability to adjust shutter speed, aperture, and ISO to compensate for the extreme lighting conditions during an eclipse. This flexibility helps in capturing well-exposed images, particularly during the brief moments of totality.
- High Dynamic Range (HDR): A camera with HDR capabilities can help in capturing the wide range of brightness levels during an eclipse, from the bright sun to the darkened sky. This feature ensures that both highlights and shadows are well-represented in your photos.
- Image Stabilization: Optical or digital image stabilization is essential for reducing blurriness caused by shaky hands, especially when shooting at high zoom levels. This feature allows for clearer images, which is particularly important when capturing fast-moving celestial events.
- Raw Image Format: The ability to shoot in RAW format provides greater flexibility in post-processing. This feature is vital for eclipse photography, as it allows you to adjust exposure and recover details that might be lost in JPEG images.
- Good Low-Light Performance: A camera that performs well in low-light conditions ensures that you can capture the eclipse’s various phases, particularly during totality when light levels drop significantly. Look for cameras with larger sensors or those known for their low-light capabilities.
- Built-in ND Filters: Neutral Density (ND) filters reduce the intensity of the sunlight entering the camera, making it safer to photograph the sun directly without risking damage to the sensor. This feature is particularly useful for eclipse photography.
- Durability and Weather Resistance: Since eclipses may require you to be outdoors for extended periods, a durable and weather-resistant camera can withstand varying conditions. This is essential for ensuring your camera remains functional during the event.
How Does Sensor Size Influence Eclipse Image Quality?
The sensor size of a camera significantly impacts the quality of images captured during an eclipse, affecting factors like resolution, low-light performance, and depth of field.
- Large Sensors: Cameras with larger sensors, such as full-frame or APS-C sensors, typically offer better image quality due to their ability to capture more light. This is particularly beneficial during an eclipse, where lighting conditions can change rapidly, allowing for clearer and more detailed images.
- Smaller Sensors: Point-and-shoot cameras often have smaller sensors, which can lead to increased noise in images, especially in lower light situations like during an eclipse. The smaller sensor size limits the amount of light captured, resulting in less detail and potential loss of color accuracy.
- Dynamic Range: Larger sensors generally provide a greater dynamic range, allowing them to better handle the contrast between the bright sun and the darkened sky during an eclipse. This means images can retain more detail in both highlights and shadows, producing a more balanced and visually appealing photograph.
- Depth of Field: The sensor size also influences depth of field, with larger sensors allowing for a shallower depth of field. This can be particularly useful for isolating the eclipse from the background, creating striking images with a blurred foreground or background.
- Lens Compatibility: Cameras with larger sensors often have access to a wider variety of high-quality lenses, which can enhance image quality during an eclipse. The ability to use specialized lenses, such as telephoto lenses, can help capture detailed images of the solar corona and surrounding phenomena.
Why Is Optical Zoom Important for Capturing Eclipses?
Optical zoom is important for capturing eclipses because it allows photographers to enlarge the image of the eclipse without losing detail or quality, which is essential for such a rare and dynamic event.
According to a study by the American Astronomical Society, using optical zoom can significantly enhance the visibility of solar features during an eclipse, allowing for better documentation of phenomena such as solar prominences and the corona (American Astronomical Society, 2020). This is crucial since eclipses happen infrequently, and having the capability to capture intricate details can greatly enhance understanding and appreciation of this celestial event.
The underlying mechanism involves the physics of light and lenses. Optical zoom utilizes a series of glass elements that adjust to magnify the image while maintaining clarity. In contrast, digital zoom merely crops the image and can result in pixelation, which detracts from the quality of the photograph. The better the optical zoom capability of a camera, the more effectively it can capture distant objects, such as the sun during an eclipse, ensuring that even subtle details are preserved in the final image.
Additionally, the ability to zoom in allows photographers to maintain a safe distance from the sun while still achieving a close-up view of the eclipse. This is particularly important because observing the sun directly without proper filtration can damage the eyes. Thus, a point-and-shoot camera with strong optical zoom capabilities can offer a practical solution for both safety and image quality.
What Types of Point and Shoot Cameras Are Best for Eclipse Viewing?
When looking for the best point and shoot camera for eclipse viewing, consider the following types:
- Superzoom Cameras: These cameras feature a long zoom range, allowing you to capture distant celestial events like an eclipse with great detail.
- Compact Cameras with Solar Filters: Some compact cameras can be fitted with solar filters, making them suitable for safely capturing images of the sun during an eclipse.
- Bridge Cameras: With manual controls and advanced features, bridge cameras offer the versatility of DSLRs while remaining portable, ideal for eclipse photography.
- Smartphone Cameras with Attachments: Modern smartphones can take impressive photos, and with the right lens attachments, they can effectively capture eclipse moments.
Superzoom Cameras: These cameras typically have a zoom range that extends from wide-angle to telephoto, which is invaluable when photographing events like solar eclipses from various distances. Their built-in stabilization features also help to minimize shake during handheld shooting, ensuring clearer images.
Compact Cameras with Solar Filters: These cameras are lightweight and easy to carry, making them convenient for outdoor events. When paired with a solar filter, they can protect sensor damage while allowing for safe, direct sun photography during an eclipse.
Bridge Cameras: Bridge cameras provide the best of both worlds: they often include significant zoom capabilities and manual settings for exposure, shutter speed, and aperture. This flexibility allows photographers to adapt to changing light conditions during the eclipse, ensuring high-quality images.
Smartphone Cameras with Attachments: With advancements in smartphone technology, many models can shoot in high resolution, making them surprisingly effective for capturing celestial events. Using clip-on lenses or solar filters designed for smartphones can enhance their capability to photograph an eclipse safely and creatively.
Which Point and Shoot Cameras Provide the Best Low-Light Performance?
The best point and shoot cameras for low-light performance, particularly for capturing events like an eclipse, include:
- Canon PowerShot G7 X Mark III: This camera features a 1-inch sensor that excels in low-light conditions, allowing for clear images with less noise even at higher ISO settings.
- Sony RX100 VII: With its advanced autofocus system and large aperture lens, this camera is designed to perform exceptionally well in dim lighting, making it ideal for capturing the nuances of an eclipse.
- Fujifilm XF10: Its APS-C sensor and wide aperture make it capable of producing vivid images in low-light environments, ensuring that you capture every detail of the eclipse.
- Panasonic Lumix ZS200: This compact camera is equipped with a 1-inch sensor and a fast lens, providing excellent low-light capabilities and the ability to shoot in challenging lighting conditions.
- Nikon Coolpix P1000: Known for its impressive zoom capabilities, this camera also performs reasonably well in low-light situations, allowing you to capture distant celestial events effectively.
The Canon PowerShot G7 X Mark III is particularly well-regarded for its ability to handle low light thanks to its large sensor and fast lens, which not only reduces noise but also enhances image quality during twilight conditions, such as those experienced during solar eclipses.
The Sony RX100 VII stands out for its remarkable autofocus system, which is crucial for tracking moving celestial bodies, while its large aperture allows for more light to enter the camera, improving performance in low-light scenarios.
The Fujifilm XF10’s APS-C sensor provides a larger surface area for capturing light, which translates to better performance in low-light situations, making it a great choice for photographers looking to document eclipses without compromising on detail.
The Panasonic Lumix ZS200’s compact design houses a powerful 1-inch sensor that excels in low-light photography, providing the versatility needed for capturing both wide shots and detailed close-ups during an eclipse.
Lastly, the Nikon Coolpix P1000, with its extensive zoom range, is beneficial for capturing eclipses from a distance, and its decent low-light performance ensures that you can still achieve clear and vibrant images even when lighting conditions are not optimal.
What Additional Accessories Can Enhance Eclipse Photography?
Enhancing eclipse photography can be achieved with several accessories that improve image quality and protection during the event.
- Solar Filters: Solar filters are essential for protecting your camera sensor and achieving stunning images of the sun during an eclipse. These filters reduce the intensity of sunlight, allowing you to capture the details of the sun’s surface without risking damage to your equipment.
- Tripod: A sturdy tripod stabilizes your camera, ensuring sharp images, especially in low-light conditions during the eclipse. It allows for longer exposure times without motion blur, which is particularly useful for capturing the different phases of the eclipse.
- Remote Shutter Release: A remote shutter release helps minimize camera shake when taking photos, which can be critical when photographing celestial events. This accessory allows you to take pictures without physically touching the camera, ensuring the images remain sharp and clear.
- Extra Batteries: Eclipses can last for several hours, and having extra batteries ensures that your camera remains powered throughout the event. It’s crucial to be prepared, as the excitement of an eclipse can lead to unexpected power consumption.
- Lens Cleaning Kit: A lens cleaning kit is important to maintain the clarity of your images. Dust, fingerprints, or smudges on your lens can ruin eclipse photos, so having the right tools to keep your lens clean is vital.
- Wide-Angle Lens: A wide-angle lens allows you to capture the entire scene, including the landscape under the eclipse. This can create dramatic and captivating images that show the effect of the eclipse on the environment.
- ND Filters: Neutral density (ND) filters help reduce the amount of light entering the lens without affecting color balance. This is particularly beneficial during the brighter phases of the eclipse, enabling longer exposures and more creative photographic effects.
- Smartphone Adapter: A smartphone adapter allows you to attach your smartphone to your camera or telescope for capturing images or video. This is a great way to share your experience in real-time, especially if you want to document the event for social media.
How Can You Set Up Your Point and Shoot Camera for the Best Eclipse Shots?
To capture stunning images of an eclipse with a point and shoot camera, specific settings and techniques should be utilized.
- Use a Solar Filter: A solar filter is essential for protecting your camera’s sensor and capturing clear images of the sun during an eclipse.
- Adjust Exposure Settings: Proper exposure settings are crucial; use manual mode to adjust ISO, aperture, and shutter speed for optimal results.
- Use a Tripod: A tripod stabilizes your camera, reducing shake and allowing for sharper images, especially in lower light conditions during the eclipse.
- Focus Manually: Autofocus may struggle with the brightness of the sun; switching to manual focus can help you achieve the desired sharpness.
- Practice Before the Event: Familiarize yourself with your camera settings and practice shooting in similar lighting conditions prior to the eclipse.
Using a solar filter is essential for taking safe and effective photographs of the sun. It prevents damage to your camera’s sensor and ensures that the sun’s details remain visible without overexposure.
Adjusting exposure settings is vital for capturing the dynamic changes in light that occur during an eclipse. By utilizing manual mode, you can fine-tune your ISO, aperture, and shutter speed to adapt to the eclipse’s phases.
A tripod is an invaluable tool when photographing the eclipse, as it minimizes camera shake and allows for longer exposure times without blurriness. This is especially helpful during the partial phases when light levels can vary significantly.
Manually focusing your camera can improve your results since autofocus may be unreliable in bright conditions. By setting your focus manually, you can maintain sharpness on the eclipse without the camera trying to refocus on the surrounding sky.
Practicing before the eclipse ensures you are comfortable with your camera’s settings and functionality. By shooting in similar lighting conditions, you can gain confidence and improve your technique, leading to better results during the actual event.
What Camera Settings Should You Adjust for Eclipse Photography?
When photographing an eclipse with a point and shoot camera, certain settings are crucial to capture the moment effectively.
- Exposure Compensation: Adjusting the exposure compensation is essential during an eclipse because the changing light conditions can confuse the camera’s automatic settings. Increasing the exposure will help prevent underexposure and ensure that the sun’s corona is visible during totality.
- ISO Settings: Setting the ISO appropriately can significantly affect the quality of your images. A lower ISO, such as 100 or 200, is ideal for bright conditions, as it minimizes noise, while adjusting it higher during the darker phases will help maintain detail without overexposing.
- Aperture Control: Using a wide aperture (lower f-stop number) can allow more light to enter the camera, which is useful during the totality phase of an eclipse. However, for the brighter phases, a narrower aperture can help maintain a sharp focus and depth of field.
- White Balance: Setting the correct white balance is crucial to ensure that the colors of the sky and the sun appear natural. Utilizing the daylight setting can help achieve a more accurate representation of colors, but it may be beneficial to experiment with different settings to find the most visually appealing results.
- Manual Focus: Autofocus may struggle in the low-light conditions of an eclipse, so switching to manual focus can help ensure that the sun is sharp and clear. This allows for more control over your composition and can help avoid blurry images caused by autofocus errors.
- Use of Filters: Solar filters are necessary to protect your camera’s sensor and your eyes while photographing the eclipse. These filters reduce the sun’s brightness and prevent damage, allowing you to safely capture the event without overexposing your images.
How Can You Ensure Safety While Photographing an Eclipse?
Ensuring safety while photographing an eclipse is crucial to protect both your eyes and your camera equipment.
- Solar Filters: Use solar filters specifically designed for photography to protect your camera sensor from intense sunlight.
- Eye Protection: Always wear proper eclipse glasses to shield your eyes from harmful rays while looking directly at the sun.
- Stable Tripod: Utilize a sturdy tripod to secure your camera and prevent any accidental drops or shake during the shoot.
- Practice Beforehand: Familiarize yourself with your camera settings and equipment in advance, ensuring you can quickly adjust during the eclipse.
- Plan Your Location: Choose a safe and open location for your shoot, away from obstacles and with a clear view of the sky.
Solar filters are essential as they block out harmful sunlight, allowing you to capture the eclipse without damaging your camera’s sensor. These filters come in various types and should be securely attached to the front of your lens before you start photographing.
Eye protection is vital since looking at the sun without appropriate glasses can cause severe eye damage. Eclipse glasses must meet the ISO 12312-2 international safety standard to ensure they effectively block harmful solar radiation.
A stable tripod is important for maintaining camera stability, especially during long exposures or when using zoom lenses. An unstable setup can lead to blurry images or even the risk of dropping your camera, so investing in a quality tripod is wise.
Practicing with your camera settings before the event allows you to familiarize yourself with the necessary adjustments needed for capturing the eclipse. This preparation helps you avoid missing critical moments due to fumbling with settings during the event.
Lastly, planning your location ensures you have a clear view of the eclipse without obstructions such as trees or buildings. Being in a safe area also means you can focus on photography without worrying about hazards or distractions around you.
Related Post: