Unlike other models that struggle with high zoom ranges or compactness, I’ve found the Panasonic LUMIX ZS99 Compact Camera 30x Zoom 4K Video to excel in both areas. After testing its Leica lens, I was amazed by the sharpness from sweeping landscapes to detailed close-ups, all in a pocket-sized body. The 4K video quality is stunning, especially when capturing fast-moving scenes or vibrant sunsets.
What really sets it apart is the versatile zoom and intuitive controls, perfect for both beginners and more advanced shooters. The tiltable touchscreen makes shooting from tricky angles a breeze, and the built-in Bluetooth ensures instant sharing. I’ve used many compact cameras, but this one’s combination of performance, portability, and user-friendly features makes it my top pick for capturing life’s moments effortlessly.
Top Recommendation: Panasonic LUMIX ZS99 Compact Camera 30x Zoom 4K Video
Why We Recommend It: This camera offers a standout 24-720mm Leica lens with 30x zoom, high-quality 4K video, and a compact design that fits comfortably in your pocket. Its tiltable touchscreen simplifies framing tricky shots, while Bluetooth makes sharing quick and easy. Compared to others, it balances professional features with travel-friendly size, making it ideal for capturing details and spontaneity without hassle.
Best point and shoot camera tips: Our Top 5 Picks
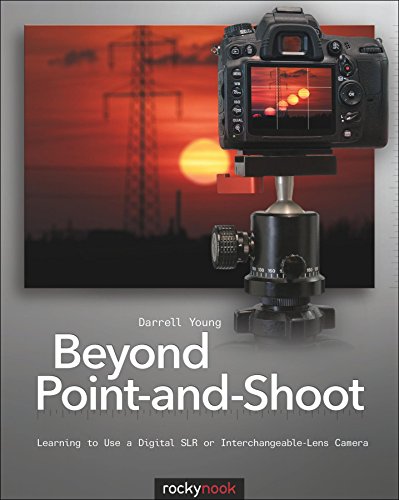
- Beyond Point-and-Shoot: Learning to Use a Digital SLR or – Best Value
- DSLR Photography Cheat Sheet for Canon Nikon Sony 4x3in – Best Premium Option
- Panasonic LUMIX ZS99 Compact Camera 30x Zoom 4K Video – Best Point-and-Shoot Camera for Travel
- Hoorola 5K 80MP Dual Screen Vlogging Camera with 18X Zoom – Best for Vlogging and Content Creation
- WABL Digital Camera, 4K 64MP UHD Dual Screens Camera, 18X – Best Compact Point-and-Shoot Camera
Beyond Point-and-Shoot: Learning to Use a Digital SLR or
- ✓ Clear, easy-to-understand tips
- ✓ Practical exercises included
- ✓ Compact and portable
- ✕ Basic camera knowledge needed
- ✕ Less focus on advanced techniques
| Book Condition | Used, in Good Condition |
| Author | Rocky Nook |
| Price | USD 19.64 |
| Subject Focus | Learning to Use a Digital SLR or Point-and-Shoot Camera |
| Intended Audience | Beginners or Amateur Photographers |
| Format | Printed Book |
Flipping through the pages of “Beyond Point-and-Shoot,” I found myself nodding more than once at the practical tips sprinkled throughout. The moment I started applying some of these techniques to my own camera, I noticed my shots instantly improved.
It’s like having a friendly mentor guiding you step by step.
The book doesn’t overwhelm you with jargon. Instead, it breaks down complex concepts into simple, actionable advice.
I especially appreciated the sections on understanding your camera’s manual settings and how to use them creatively. It made me feel more confident to experiment without fear of messing up.
What stood out is the real-world examples that make everything relatable. Instead of abstract tips, I got clear instructions on framing, focusing, and adjusting exposure for different situations.
It’s perfect if you’re tired of taking random photos and want to develop a more intentional style.
The layout is clean, with plenty of diagrams and illustrations that make the learning process smoother. I also liked that the book covers common mistakes and how to fix them on the fly.
Plus, it’s compact enough to carry around, which keeps the inspiration flowing even when you’re out shooting.
After extended reading and practice, I feel more equipped to move beyond auto mode. This book truly bridges the gap between casual snapshots and meaningful photographs.
If you’re ready to elevate your point-and-shoot skills, it’s a solid investment.
DSLR Photography Cheat Sheet for Canon Nikon Sony 4x3in

- ✓ Compact and portable
- ✓ Clear, easy-to-understand tips
- ✓ Fits any camera model
- ✕ Limited detail for advanced users
- ✕ Not a replacement for full manuals
| Number of Pages | 30 pages |
| Sheet Size | 3 x 4 inches |
| Number of Cheat Sheets | 16 double-sided sheets |
| Compatibility | Suitable for Canon, Nikon, Sony, and other DSLR cameras |
| Material | Durable cardstock with color-coded design |
| Included Accessories | Metal carabiner and sturdy keyring |
As I unfolded this tiny cheat sheet for the first time, I was struck by how sturdy and compact it felt in my hand. It’s only 3 by 4 inches, but the color-coded pages immediately caught my eye, promising quick access to essential tips without digging through a manual.
Flipping through the 16 double-sided pages, I appreciated how organized everything was. Each section, from exposure to lighting to shooting modes, is clearly labeled and easy to scan.
I tried it out during a sunset shoot, referencing it for settings to capture the warm glow without overexposing.
What really surprised me is how comprehensive it is yet simple enough for beginners. I could see seasoned photographers also benefiting from quick reminders on tricky subjects like waterfalls or fireworks.
The metal carabiner makes it easy to clip onto my camera bag, so I always have it within reach.
The tips are concise, avoiding jargon but still detailed enough to make a difference in my shots. I found myself referring to it multiple times during a session, and it honestly boosted my confidence.
Plus, it works with any camera brand—Canon, Nikon, Sony—so no need to worry about compatibility.
While it’s incredibly handy, it’s a bit limited if you need in-depth explanations or advanced techniques. Still, for quick guidance on the go, it’s a real lifesaver.
At just about $11, it’s one of the best little investments I’ve made for my photography gear.
Panasonic LUMIX ZS99 Compact Camera 30x Zoom 4K Video

- ✓ Compact and lightweight
- ✓ Excellent 30x zoom
- ✓ 4K video and photo
- ✕ Limited manual controls
- ✕ Small grip for larger hands
| Lens | 24-720mm LEICA lens with 30x optical zoom |
| Sensor | 1/2.3-inch (approximate) MOS sensor |
| Display | 1,840,000-dot tiltable touchscreen |
| Video Recording | 4K UHD at 30p, 120fps high-speed HD video |
| Connectivity | Bluetooth v5.0, USB Type-C |
| Image Capture | 4K Photo at 30fps |
Instead of lugging around a bulky DSLR or fumbling with complicated settings, the Panasonic LUMIX ZS99 slips effortlessly into your pocket. I’ve found that its sleek, compact design makes it the perfect travel buddy—ready to capture everything from sprawling cityscapes to candid moments without weighing you down.
The 24-720mm LEICA lens immediately stands out, offering an impressive 30x zoom that doesn’t sacrifice clarity. You can get up close to wildlife or distant landmarks without losing detail.
And with the compact body, it’s surprisingly easy to handle, even when you’re on the move.
Shooting in 4K is a real game-changer. I was able to record vibrant videos and crisp photos, especially with the quick burst mode at 30fps.
The high-speed 120fps slow-motion option added a fun creative touch, perfect for capturing dynamic moments like splashes or sports.
The tiltable 1,840k-dot touchscreen is super handy for shooting at tricky angles or selfies. Plus, charging via USB-C means I could top up the battery anywhere, which is a huge plus for travel.
Sharing images is seamless with Bluetooth, and the dedicated button makes transferring to your phone quick and straightforward.
Overall, the ZS99 combines power, portability, and smart features in a way that makes photography feel effortless. It’s ideal if you want high-quality results without the fuss of larger cameras.
Sure, it’s not perfect—like the limited manual controls—but for everyday capturing, it hits the mark.
Hoorola 5K 80MP Dual Screen Vlogging Camera with 18X Zoom

- ✓ Stunning 5K/80MP clarity
- ✓ Dual screens for easy framing
- ✓ Compact and travel-ready
- ✕ Digital zoom can reduce quality
- ✕ Limited manual controls
| Sensor | Advanced CMOS sensor |
| Video Resolution | 5K Ultra HD (5120 x 2880 pixels) |
| Photo Resolution | 80 Megapixels |
| Zoom | 18X digital zoom |
| Display | 2.8-inch rear LCD screen and 1.4-inch front selfie screen |
| Battery Life | Over 160 minutes of recording with two batteries |
Imagine you’re at a lively family gathering, trying to capture the perfect shot of everyone laughing together. You flip open the Hoorola 5K 80MP Dual Screen Vlogging Camera, and instantly, the bright 2.8-inch rear display shows a crisp, detailed view of what you’re framing.
Meanwhile, the 1.4-inch front screen helps you line up selfies or group shots without guesswork.
This camera feels surprisingly compact for all it offers. The sturdy build and smooth dual screens make it easy to handle, even when you’re on the move.
Its advanced CMOS sensor truly delivers stunning 5K videos and 80-megapixel stills—textures, colors, and light all look vibrant and lifelike. Shooting in low light or bright sunlight, the autofocus is quick, so you never miss crisp details.
The 18X zoom is a game-changer. You can zoom in on distant wildlife or stage moments without sacrificing clarity.
Switching between scene modes like night, beach, or portrait is straightforward, and manual controls give you creative freedom. Plus, features like slow-motion, burst, and time-lapse let you craft professional-looking content easily.
Traveling with this camera is a breeze. It comes with two batteries, a high-speed SD card, and a USB-C cable—ready to shoot straight out of the box.
The ability to record while charging means you’ll never miss capturing a sunset or special event.
All in all, it’s a versatile, beginner-friendly device that can elevate your vlogs and photos without fuss. Whether you’re a newbie or a seasoned creator, this camera adapts to your needs with ease.
WABL Digital Camera, 4K 64MP UHD Dual Screens Camera, 18X

- ✓ Easy to use and portable
- ✓ Sharp 64MP photos and 4K videos
- ✓ Versatile shooting modes
- ✕ Struggles in low light
- ✕ Manual focus can be tricky
| Sensor | CMOS sensor with 64MP resolution |
| Video Resolution | 4K at 30fps |
| Optical Zoom | Digital 18X zoom |
| Display | 2.8-inch IPS LCD screen |
| Storage | 64GB microSD card included, supports expandable storage |
| Battery Life | Up to 80 minutes of continuous use with two rechargeable batteries |
Ever tried capturing a spontaneous family moment only to realize your phone’s camera just doesn’t cut it? That’s exactly the kind of frustration this WABL 4K digital camera swooped in to fix.
Its compact size makes it easy to grab when you’re out and about, but it’s the dual screens that truly caught my eye. Flipping between angles with a long press of the “OK” button felt effortless, giving me a new perspective every time.
The 64MP sensor produces surprisingly sharp photos, even in less-than-ideal lighting. I tested it during a sunset walk, and the details in the clouds and distant trees still looked vivid.
The 4K video quality was clear, and I appreciated how easy it was to switch between shooting modes—burst for action shots, time-lapse for scenic views, and selfies with the flip screen. It’s perfect for kids or beginners who want to explore photography without the complicated settings.
The 18X digital zoom is a real highlight. I was able to zoom in on distant mountain peaks or wildlife from a safe distance, and the images remained crisp.
The camera’s pocket-sized design means I tossed it in my bag without worry, and the 64GB memory card easily stored hundreds of photos. The two rechargeable batteries lasted long enough for a full day of adventures, and the auto shut-off saved power when I forgot to turn it off.
While it’s user-friendly and versatile, it does struggle a bit in very low light, and manual focus can be tricky for absolute beginners. Overall, this camera feels like a great starter option for capturing memories on the go without breaking the bank.
What Are the Most Effective Tips for Using a Point and Shoot Camera?
Here are some of the best tips for using a point and shoot camera effectively:
- Understand Your Camera Settings: Familiarize yourself with the various settings available on your camera, such as exposure, ISO, and white balance. Knowing how to adjust these settings can significantly improve your photos in different lighting conditions.
- Use Natural Light: Whenever possible, take advantage of natural light for your photography. Shooting during the golden hour—shortly after sunrise or before sunset—can help you capture softer, warmer images with better contrast and depth.
- Frame Your Shots: Pay attention to composition and framing when taking photos. Utilize the rule of thirds by imagining a grid over your viewfinder, placing points of interest along the grid lines or at their intersections for more balanced and engaging images.
- Keep the Lens Clean: Regularly clean the lens to avoid blurry or hazy photos caused by dirt and fingerprints. Use a microfiber cloth specifically designed for camera lenses to gently wipe the surface without scratching it.
- Experiment with Different Modes: Most point and shoot cameras come with various shooting modes such as portrait, landscape, and macro. Don’t hesitate to experiment with these modes to see how they change the focus and exposure of your images based on the scene you are capturing.
- Practice Good Stabilization: To prevent motion blur, hold your camera steady while shooting. Use both hands, brace your elbows against your body, and consider using a tripod or resting the camera on a stable surface for longer exposures.
- Review and Learn: After taking photos, review them on your camera to see what worked and what didn’t. This practice will help you identify areas for improvement and develop your photography skills over time.
How Can You Select the Best Point and Shoot Camera for Your Photography Style?
Selecting the best point and shoot camera for your photography style involves considering various factors that align with your needs and preferences.
- Image Quality: Look for a camera with a larger sensor size as it typically produces better image quality, especially in low light conditions. Higher megapixels can also contribute to sharper images, but the sensor’s quality and technology are more critical than just pixel count.
- Zoom Capability: Assess the optical zoom range, as this determines how close you can get to your subjects without sacrificing image quality. A camera with a versatile zoom range allows you to capture a variety of subjects, from landscapes to close-ups.
- Manual Controls: If you desire more creative control over your photography, consider a point and shoot that offers manual settings such as aperture, shutter speed, and ISO. This flexibility enables you to experiment with different techniques and adapt to various shooting conditions.
- Portability: Since point and shoot cameras are designed for convenience, evaluate their size and weight to ensure they fit comfortably in your bag or pocket. A compact camera encourages you to carry it everywhere, allowing you to seize spontaneous photo opportunities.
- Battery Life: Investigate the battery life specifications, as longer battery performance means you can shoot more without worrying about recharging. It’s beneficial to choose a model that also allows for easy charging or carries spare batteries for extended outings.
- Connectivity Features: Consider cameras with built-in Wi-Fi or Bluetooth capabilities, which facilitate easy sharing of your photos to smartphones or social media platforms. This feature is especially useful for photographers who want to share their work instantly.
- Video Recording Options: If you plan to capture videos as well, check for the camera’s video quality and frame rate capabilities. Features like 4K recording or slow-motion video can enhance your creative possibilities.
- Durability: If you shoot in various environments, look for a robust camera that is weather-resistant or shockproof. This durability ensures the camera can withstand different conditions, making it reliable for outdoor adventures.
What Techniques Can Optimize Your Point and Shoot Photography Experience?
To enhance your point and shoot photography experience, consider the following techniques:
- Understand Your Camera Settings: Familiarize yourself with the various settings of your point and shoot camera, such as ISO, aperture, and shutter speed. Knowing how to adjust these settings can help you achieve better exposure and clarity in different lighting conditions.
- Use the Grid Lines: Enable grid lines on your camera’s display to assist with composition. This technique follows the rule of thirds, allowing you to position subjects in a more visually appealing way, which can significantly improve the overall quality of your photos.
- Stabilize Your Camera: To avoid blurry images, stabilize your camera by using both hands and keeping your elbows close to your body. Alternatively, use a tripod or monopod when possible, especially in low-light situations, to ensure sharper images.
- Experiment with Different Angles: Don’t just shoot from eye level; try different perspectives by crouching down or finding a higher vantage point. Changing your angle can produce more dynamic and interesting compositions that capture the viewer’s attention.
- Utilize Natural Light: Make the most of natural light by shooting during the golden hour, which is shortly after sunrise or before sunset. This soft, warm light enhances the colors and textures in your photos, resulting in more vibrant images.
- Practice Focusing Techniques: Learn how to use your camera’s autofocus system effectively or switch to manual focus when necessary. Taking control of focus can help you highlight specific subjects while blurring distracting backgrounds.
- Keep Your Lens Clean: Regularly clean your camera lens to avoid smudges and dust that can degrade image quality. A clean lens ensures that you capture crisp and clear photographs, enhancing the overall impact of your images.
- Take Multiple Shots: Don’t hesitate to take several shots of the same scene, especially if the lighting or movement is unpredictable. This increases your chances of capturing the perfect moment, and you can choose the best image later.
- Post-Processing: Use photo editing software to enhance your images after shooting. Simple adjustments like cropping, color correction, and brightness can significantly improve your photos and bring out details that may not be visible in the original shot.
Which Camera Settings Should You Adjust for Better Results?
To achieve better results with your point and shoot camera, consider adjusting the following settings:
- ISO: Adjusting your camera’s ISO setting helps to control its sensitivity to light.
- Aperture: The aperture setting affects the depth of field and the amount of light entering the lens.
- Shutter Speed: This setting determines how long the camera’s sensor is exposed to light, influencing motion capture.
- White Balance: Setting the correct white balance ensures that colors in your photos appear natural and accurate.
- Focus Mode: Adjusting the focus mode can improve sharpness and clarity in your images.
- Shooting Mode: Utilizing different shooting modes can optimize your camera’s performance for various scenarios.
ISO: Increasing the ISO can be beneficial in low-light conditions, allowing for brighter images without a flash. However, higher ISO settings can introduce digital noise, so it’s best to find a balance suitable for your lighting situation.
Aperture: A wider aperture (lower f-number) allows for more light, which is ideal for low-light photography and creates a shallow depth of field, blurring the background. Conversely, a smaller aperture (higher f-number) increases depth of field, keeping more of the scene in focus, which is great for landscapes.
Shutter Speed: A fast shutter speed freezes motion, making it perfect for capturing sports or fast-moving subjects, while a slower shutter speed can create motion blur effects, adding creativity to your shots. It’s essential to stabilize the camera when using slower speeds to avoid unintentional blur.
White Balance: By adjusting the white balance settings, you can compensate for different lighting conditions, such as daylight, tungsten, or fluorescent light. This adjustment helps maintain color accuracy, preventing photos from appearing too warm or too cool.
Focus Mode: Most point and shoot cameras offer different focus modes, such as single-point or multi-point autofocus. Choosing the right focus mode can enhance the sharpness of your subject, particularly in situations with multiple elements or varying distances.
Shooting Mode: Many point and shoot cameras come with preset shooting modes like portrait, landscape, and night. These modes automatically adjust settings like ISO, aperture, and shutter speed to suit specific scenarios, making it easier to capture great shots without extensive manual adjustment.
How Can You Enhance Your Composition for Stunning Images?
To enhance your composition for stunning images using a point and shoot camera, consider the following tips:
- Rule of Thirds: This compositional guideline suggests dividing your frame into a grid of nine equal parts and placing your subject along these lines or at their intersections. This technique helps create balanced and engaging images by drawing the viewer’s eye to important elements in the frame.
- Leading Lines: Incorporating natural lines within your scene, such as roads, rivers, or architectural features, can guide the viewer’s eye toward the main subject. This method adds depth to your photographs and can create a sense of movement or direction in your images.
- Framing: Use natural elements like trees, windows, or doorways to frame your subject. This technique helps to isolate the main subject from the background, adding context and focus to your image while enhancing visual interest.
- Check Backgrounds: Always be mindful of what’s behind your subject to avoid distractions. A cluttered or busy background can detract from the main focus, so look for simple, unobtrusive backdrops that allow your subject to stand out.
- Experiment with Angles: Changing your shooting angle can dramatically alter the composition and impact of your images. Try shooting from high, low, or unusual perspectives to create a more dynamic and interesting composition.
- Use Natural Light: Take advantage of natural light during the golden hours—shortly after sunrise or before sunset—for softer, more flattering illumination. This type of light can enhance colors and textures, making your images more visually appealing.
- Focus on Details: Instead of always capturing wide shots, zoom in on details or textures that tell a story. This approach can add variety to your portfolio and highlight unique aspects of your subject that might otherwise go unnoticed.
- Practice Patience: Take your time to observe your surroundings and wait for the right moment to capture your shot. Patience can lead to better compositions as you’ll be more likely to recognize the perfect light or action that enhances your photograph.
What Lighting Conditions Should You Consider for Point and Shoot Photography?
When considering lighting conditions for point and shoot photography, several key factors can significantly impact the quality of your images.
- Natural Light: Utilizing natural light is one of the best practices for point and shoot photography, as it often provides a soft and flattering illumination. Early mornings and late afternoons, known as the golden hours, yield warm tones and long shadows that can enhance the aesthetic appeal of your photos.
- Artificial Light: Familiarizing yourself with various artificial light sources, such as incandescent, fluorescent, and LED, is crucial since each produces different color temperatures. Adjusting your camera’s white balance settings can help achieve more accurate colors when shooting under artificial lighting, reducing unwanted color casts.
- Low Light Conditions: Point and shoot cameras can struggle in low-light settings due to limited sensor capabilities. To combat this, consider using a higher ISO setting, but be mindful that increasing ISO can introduce noise, so finding a balance is essential.
- Backlighting: Shooting against a bright light source can create dramatic silhouettes, but it may result in underexposed subjects. To address this, use your camera’s exposure compensation feature to brighten the subject or consider using fill flash to illuminate the foreground.
- Flash Use: Built-in flashes can be useful in low-light situations, but they often produce harsh lighting and unflattering shadows. Using the flash sparingly or employing techniques like bouncing the flash off a wall or ceiling can soften the light and create a more natural effect.
- Reflections and Glare: When shooting in bright conditions, reflections and glare can wash out images, particularly with shiny surfaces. Using a polarizing filter can help reduce glare and enhance colors by cutting through reflections, making your photos more vibrant.
How Should You Maintain and Care for Your Point and Shoot Camera?
To ensure your point and shoot camera remains in optimal condition, follow these maintenance and care tips:
- Regular Cleaning: Keeping your camera clean is essential for optimal performance and image quality.
- Proper Storage: Store your camera in a safe, dry place to protect it from moisture and dust.
- Battery Maintenance: Take care of your camera’s battery to prolong its lifespan and performance.
- Use a Protective Case: Utilize a case to shield your camera from physical damage during transport.
- Firmware Updates: Regularly check for and apply firmware updates to ensure your camera functions efficiently.
Regular Cleaning: It’s important to regularly clean both the exterior and the lens of your point and shoot camera. Use a soft microfiber cloth to wipe away dust and fingerprints, and a lens cleaning solution with a dedicated lens cloth for the glass surface, as dirt can affect image quality.
Proper Storage: When not in use, store your camera in a cool, dry environment to prevent moisture buildup that can damage internal components. Consider using silica gel packets to absorb excess humidity and avoid temperature extremes that could cause condensation.
Battery Maintenance: Always remove the battery if you plan to store your camera for an extended period. Ensure the battery contacts are clean and avoid letting the battery completely discharge, as this can lead to reduced battery life.
Use a Protective Case: Invest in a quality protective case that fits your camera snugly, providing cushioning against drops and impacts. A case can also shield your camera from dust, scratches, and moisture during travel or outdoor activities.
Firmware Updates: Keeping your camera’s firmware up to date can improve performance and add new features. Check the manufacturer’s website periodically for updates and follow the instructions to ensure a smooth installation process.
Related Post: