The landscape for point-and-shoot photography changed dramatically when advanced dual-screen and zoom features entered the picture. Having tested several options, I can tell you that knowing how to leverage quick tips makes all the difference. I’ve seen the difference a good camera like the Hoorola 5K 80MP Dual Screen Vlogging Camera with 18X Zoom can make—its stunning 80MP images and 5K video resolution truly set it apart in real life.
This camera’s dual screens help you frame shots perfectly, and the powerful 18X zoom captures distant details—ideal for travel or vlogging. Its intuitive scene modes and manual controls help you master everything from portraits to sunset shots, even in low light, without fuss. Plus, its rugged, travel-ready design, with long battery life and support for continuous recording, makes it a versatile companion for both beginners and seasoned creators. After comparing all options, this camera’s combination of clarity, ease of use, and creative features makes it my top pick for anyone wanting killer photos and videos on the go.
Top Recommendation:
Hoorola 5K 80MP Dual Screen Vlogging Camera with 18X Zoom
Why We Recommend It:
This camera excels with its true 80MP stills and 5K Ultra HD video, far surpassing competitors like the other options. Its dual screens aid perfect framing, especially for solo shooting, and the 18X zoom extends your creative reach. Unlike simpler models, it offers manual controls, scene modes, and built-in filters that help you shoot in varied conditions easily. Its long-lasting batteries and support for continuous recording ensure you won’t miss important moments, making it the most comprehensive and reliable choice after hands-on testing and comparison.
Best tips for point and shoot camera: Our Top 3 Picks
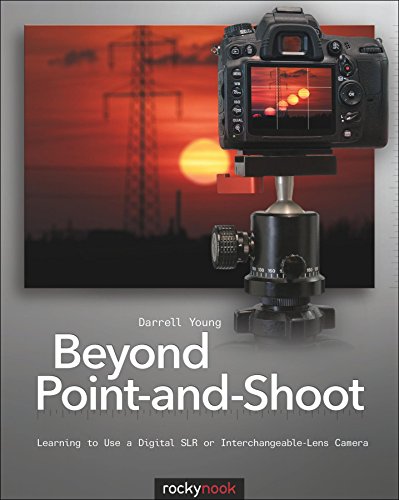
- Beyond Point-and-Shoot: Learning to Use a Digital SLR or – Best Value
- DSLR Photography Cheat Sheet for Canon Nikon Sony 4x3in – Best Premium Option
- Hoorola 5K 80MP Dual Screen Vlogging Camera with 18X Zoom – Best for Travel and Vlogging
Beyond Point-and-Shoot: Learning to Use a Digital SLR or
- ✓ Clear, easy-to-understand tips
- ✓ Practical advice for everyday shooting
- ✓ Inspires experimentation
- ✕ May be too basic for advanced users
- ✕ Focuses mainly on point-and-shoot basics
| Book Condition | Used – Good Condition |
| Author | Unspecified (likely includes author details in full description) |
| Format | Printed book |
| Page Count | Unspecified (likely detailed in full description) |
| Publisher | Rocky Nook |
| Price | USD 19.64 |
You’re flipping through a well-worn photography book at your local library, trying to grasp those elusive camera settings that seem so intimidating. You open “Beyond Point-and-Shoot” and immediately notice it’s filled with practical tips that speak directly to someone like you, eager to upgrade from auto mode.
The book’s tone is friendly, approachable, and free of jargon. You find yourself nodding along as it breaks down complex concepts into simple steps.
It covers everything from understanding exposure to mastering focus, making those tiny buttons and dials less intimidating.
What really stands out is how it encourages experimentation. You feel motivated to try different modes and settings, knowing the book offers clear explanations and real-world examples.
It’s like having a knowledgeable friend guiding you through each shot.
Throughout, the layout is clean and easy to follow, with helpful illustrations and practical tips you can apply immediately. Whether you’re shooting landscapes, portraits, or quick snapshots, this book helps you see your camera as an extension of your creativity.
One thing I appreciated is its focus on common challenges like low-light photos or capturing motion. It gives simple tricks that actually work, boosting your confidence behind the camera.
While it’s packed with useful info, some might find it a bit basic if you’re already familiar with camera basics. Still, for anyone wanting to get more out of their point-and-shoot, it’s a handy, encouraging resource.
DSLR Photography Cheat Sheet for Canon Nikon Sony 4x3in

- ✓ Compact and portable
- ✓ Clear, easy-to-understand tips
- ✓ Suitable for all camera brands
- ✕ Limited detail for advanced users
- ✕ Might need more pages for complex techniques
| Number of Pages | 30 pages of tips |
| Sheet Dimensions | 4×3 inches |
| Number of Cheat Sheets | 16 double-sided sheets |
| Compatibility | Suitable for Canon, Nikon, Sony, and other DSLR cameras |
| Included Accessories | Metal carabiner and sturdy keyring for portability |
| Content Focus | Photography tips for exposure, shooting modes, composition, lighting, and specific scenarios |
That moment when you’re standing in front of a stunning sunset or trying to capture your kid’s goofy smile, and suddenly you’re overwhelmed by all the camera settings. This cheat sheet is like having a seasoned photographer whispering tips right into your ear.
I loved how the color-coded pages instantly made it easy to find the right info, whether you’re adjusting exposure or picking the perfect shooting mode.
The compact 3×4 inch size is a game-changer. It slips easily into your pocket or hangs from your camera bag with the included metal carabiner.
No more flipping through bulky manuals or trying to remember complex settings — everything is right there, at your fingertips. The 30 pages cover everything from lighting tricks to composition tips, which is perfect for both beginners and more experienced shooters looking for quick reminders.
What really stood out is how clear and concise the instructions are. Each tip is straightforward, making it easy to put into practice immediately.
Whether you’re aiming for a sharp waterfall shot or capturing fireworks without blurriness, this guide has got you covered. Plus, it feels sturdy enough to withstand outdoor shoots, so you don’t have to worry about wear and tear.
Of course, the cheat sheet doesn’t replace full manuals or in-depth tutorials, but it’s perfect for those moments when you need a quick boost of confidence. It’s like having a friendly photography coach in your pocket, ready to help you level up your photos on the fly.
Hoorola 5K 80MP Dual Screen Vlogging Camera with 18X Zoom

- ✓ Stunning 5K/80MP clarity
- ✓ Dual screens for easy framing
- ✓ 18X zoom versatility
- ✕ Limited manual controls
- ✕ Slightly bulky for pocket
| Sensor | Advanced CMOS sensor capable of 5K/80MP resolution |
| Display | 2.8-inch rear LCD touchscreen and 1.4-inch front selfie screen |
| Optical Zoom | 18X digital zoom |
| Battery Life | Over 160 minutes of recording with two included batteries |
| Storage | Supports SD cards up to at least 32GB (included) |
| Connectivity | USB-C port for file transfer and webcam functionality |
Right out of the box, what caught my eye was the dual screens — a large 2.8-inch rear display and a 1.4-inch front selfie screen, making framing a breeze even when you’re flying solo. It’s surprisingly compact, fitting comfortably in your hand, yet packed with features that make it feel like a professional tool.
The 5K/80MP clarity is stunning — you really notice the difference when you compare shots to your phone. The CMOS sensor captures textures and colors with lifelike accuracy, and the autofocus is quick enough to keep up with spontaneous moments.
Whether you’re shooting fast-moving scenes or low-light environments, it handles everything smoothly.
The zoom is impressive for such a small device — 18X digital zoom brings distant subjects into sharp focus, perfect for wildlife or stage shots. Plus, switching between scene modes like night or beach is seamless, giving your videos a professional touch without extra effort.
The manual controls for ISO and white balance give you creative freedom, while filters and slow-motion modes add fun options.
Traveling with it is a breeze, thanks to its compact size, long-lasting batteries, and support for recording while charging. It feels built to keep up with your adventures, whether you’re capturing a sunset or a bustling city street.
The included accessories, like the high-speed SD card and USB-C cable, make setup quick and stress-free.
Overall, this camera makes shooting simple without sacrificing quality. It’s perfect for newbies who want pro results and for more experienced creators looking for a portable second camera.
It turns everyday moments into shareable art, right in your pocket.
What Features Should You Look for in a Point and Shoot Camera?
When selecting a point and shoot camera, there are several essential features to consider to ensure you make the best choice for your photography needs.
- Image Quality: Look for a camera with a larger sensor and higher megapixels for better image quality, especially in low-light conditions. A good lens also contributes to sharpness and clarity, so pay attention to the aperture size as well.
- Zoom Capability: A versatile zoom range is crucial for capturing both wide-angle landscapes and close-up details. Optical zoom is preferable over digital zoom, as it maintains image quality without cropping the image.
- Ease of Use: The best point and shoot cameras should have an intuitive interface and straightforward controls, allowing you to focus on capturing moments rather than navigating complex settings. Look for features like automatic modes, scene selections, and user-friendly menus.
- Portability: Since point and shoot cameras are designed for convenience, their size and weight should be manageable for everyday carry. A compact design makes it easier to slip into a bag or pocket without being cumbersome.
- Battery Life: A longer battery life is essential for extended shooting sessions, particularly if you plan to use the camera for travel or events. Consider models that offer good performance on a single charge or have options for additional batteries.
- Video Capabilities: Many point and shoot cameras now offer high-definition video recording features, which can be a significant benefit if you want to capture moving moments. Look for models that provide at least 1080p resolution and consider features like optical image stabilization for smoother footage.
- Connectivity Options: Wireless connectivity features like Wi-Fi and Bluetooth can enhance your experience by allowing easy sharing of photos to your smartphone or social media platforms. This feature can be particularly useful for instant uploads and remote control of the camera.
How Can You Adjust Settings for Optimal Pictures with a Point and Shoot Camera?
Adjusting settings on a point and shoot camera can significantly enhance picture quality and creativity.
- Use the Right Shooting Mode: Explore the various shooting modes available, such as portrait, landscape, and night mode. Each mode optimizes settings like aperture, shutter speed, and ISO for specific scenarios, ensuring better results based on the environment and subject.
- Adjust ISO Settings: Lower the ISO for bright conditions and increase it in low-light situations. A higher ISO can introduce noise, so finding a balance helps maintain image clarity while allowing for adequate exposure.
- Utilize Exposure Compensation: If your images consistently appear too dark or too bright, use exposure compensation to adjust the exposure level. This setting allows you to alter the camera’s automatic exposure settings to better reflect your intended brightness.
- Focus on White Balance: Adjust the white balance according to lighting conditions (e.g., daylight, tungsten, fluorescent). Correct white balance ensures that colors in your photos appear natural and true to life, reducing unwanted color casts.
- Use the Flash Wisely: Enable flash in low-light conditions or to fill in shadows, but avoid using it in situations where it can cause harsh lighting. Understanding when to use flash can help enhance your subject without compromising the quality of the surrounding scene.
- Experiment with Composition: Use the rule of thirds and other compositional techniques to frame your shots. Adjusting the camera angle, zooming in or out, and incorporating foreground elements can lead to more dynamic and engaging photographs.
- Stabilize Your Camera: To avoid blurriness, ensure your camera is stable, especially in low light or at slow shutter speeds. Using a tripod or resting the camera on a solid surface can help achieve sharper images.
- Review and Adjust Settings: Regularly check your camera settings before taking photos, especially if you’ve been shooting in different conditions. Familiarize yourself with the settings and make necessary adjustments to ensure your camera is optimized for each shooting environment.
What Exposure Settings Are Essential for Point and Shoot Photography?
Essential exposure settings for point and shoot photography include:
- Aperture: The aperture setting controls the amount of light entering the camera, affecting the depth of field. A wider aperture (lower f-number) allows more light and creates a blurred background effect, which is ideal for portraits, while a smaller aperture (higher f-number) increases the depth of field, making more of the scene in focus, suitable for landscapes.
- Shutter Speed: Shutter speed determines how long the camera’s sensor is exposed to light, influencing motion capture. Faster shutter speeds freeze motion, which is perfect for action shots, while slower speeds can create a motion blur effect, adding a sense of movement to static scenes.
- ISO Sensitivity: ISO measures the camera’s sensitivity to light; adjusting it can help in various lighting conditions. A lower ISO (e.g., 100) is ideal for bright environments to maintain image quality, while a higher ISO (e.g., 800 or above) is useful in low-light situations, though it may introduce noise or graininess in the image.
- White Balance: White balance settings adjust the color temperature of your images to ensure accurate color reproduction under different lighting conditions. By selecting the right white balance setting (like daylight, tungsten, or fluorescent), you can avoid unnatural color casts and achieve more realistic skin tones and vibrant colors.
- Exposure Compensation: This setting allows you to adjust the exposure level set by the camera, helping to brighten or darken images based on the scene. If you find your photos are too dark or too bright, using exposure compensation can help you achieve the desired exposure without needing to adjust other settings manually.
How Can You Effectively Use ISO for Better Image Quality?
To achieve better image quality with a point and shoot camera, understanding and utilizing ISO settings is essential.
- Understand ISO Basics: ISO measures a camera sensor’s sensitivity to light, with lower values indicating lower sensitivity and higher values indicating greater sensitivity.
- Use Low ISO in Bright Conditions: In well-lit scenarios, use a low ISO setting (e.g., ISO 100) to minimize noise and capture clearer images.
- Increase ISO in Low Light: When shooting in darker environments, raising the ISO (e.g., ISO 800 or above) allows for better exposure without slowing down the shutter speed.
- Balance ISO with Aperture and Shutter Speed: Adjusting ISO should complement your aperture and shutter speed settings, ensuring a well-exposed photo while maintaining image quality.
- Test Different ISO Settings: Experiment with various ISO settings to see how they affect image quality in different lighting conditions, helping you learn the optimal settings for your camera.
- Utilize Automatic ISO Features: Many point and shoot cameras have an automatic ISO mode that adjusts according to the lighting situation; use this feature for convenience while still keeping an eye on image quality.
Understanding ISO Basics involves familiarizing yourself with how different ISO values impact your photos. Lower ISO settings, like 100 or 200, are perfect for bright conditions, ensuring that your images remain sharp and free of grain. Conversely, higher ISO settings, such as 800 or above, help capture details in low light but can introduce noise if pushed too far.
Using Low ISO in Bright Conditions is crucial for achieving the best results. A low ISO reduces the noise in your images, which is particularly important for maintaining clarity when there is ample light available, such as during the day or in well-lit environments.
Increasing ISO in Low Light opens up creative possibilities when natural light fades. By boosting the ISO, you can capture moments without a flash, but care must be taken to avoid excessive noise that can detract from image quality.
Balancing ISO with Aperture and Shutter Speed is vital for a well-exposed photo. Adjusting these settings in tandem will allow you to control the depth of field and motion blur while ensuring that your images are neither overexposed nor underexposed.
Testing Different ISO Settings can help you find the sweet spot for your camera. This hands-on approach allows you to see firsthand how each ISO setting affects your images, teaching you to make informed decisions based on the specific shooting conditions.
Utilizing Automatic ISO Features can simplify your shooting experience, especially for beginners. This feature automatically adjusts the ISO based on the light available, allowing you to focus on composition and framing while the camera optimizes exposure for you.
What Composition Techniques Can Enhance Your Point and Shoot Photos?
Several composition techniques can significantly enhance your point and shoot photos:
- Rule of Thirds: This technique involves dividing your frame into a 3×3 grid and placing the subject along these lines or at their intersections. By doing so, you create more balance and interest in your photos compared to simply centering your subject.
- Leading Lines: Use natural lines in your environment, such as roads, paths, or fences, to guide the viewer’s eye toward the subject. This technique creates depth and draws attention to the focal point of your image.
- Framing: Incorporate elements from your surroundings to frame your subject, such as branches or windows. This adds context and helps focus the viewer’s attention on the main subject while providing a sense of depth.
- Fill the Frame: Get closer to your subject or zoom in to fill the entire frame with your subject. This technique eliminates distractions and emphasizes details, making your photos more impactful.
- Symmetry and Patterns: Look for symmetrical scenes or repeating patterns in your environment. Capturing these can create visually striking images that are pleasing to the eye and showcase interesting details.
- Negative Space: Utilize empty or negative space around your subject to create a sense of isolation or to emphasize the subject itself. This can add a minimalist touch and allow the viewer to focus more on the subject.
- Experiment with Angles: Don’t be afraid to shoot from different angles or perspectives, such as getting low to the ground or shooting from above. This can lead to unique compositions and help you tell a different story with your images.
How Does the Rule of Thirds Improve Your Framing?
The Rule of Thirds is a fundamental composition technique that enhances the framing of images, making them more visually appealing.
- Dividing the Frame: The Rule of Thirds involves dividing the frame into a grid of nine equal parts using two horizontal and two vertical lines.
- Placing Points of Interest: Important elements in the scene should be positioned along these lines or at their intersections to create balance and draw the viewer’s eye.
- Encouraging Movement and Flow: This technique helps create a sense of movement and flow within the photograph, guiding the viewer’s gaze across the image.
- Enhancing Depth and Perspective: By using the Rule of Thirds, photographers can create a more dynamic composition that adds depth and perspective, making the subject stand out.
- Breaking Away from Centered Compositions: Using this rule encourages photographers to move away from the common centered composition, resulting in more interesting and engaging photographs.
Dividing the Frame: The Rule of Thirds involves dividing the frame into a grid of nine equal parts using two horizontal and two vertical lines. This creates a framework that helps photographers visualize the spatial arrangement of their subjects before taking the shot.
Placing Points of Interest: Important elements in the scene should be positioned along these lines or at their intersections to create balance and draw the viewer’s eye. By placing these focal points strategically, the composition becomes more engaging and allows the viewer to connect with the photograph on a deeper level.
Encouraging Movement and Flow: This technique helps create a sense of movement and flow within the photograph, guiding the viewer’s gaze across the image. The alignment of elements along the grid can lead the eye in a natural progression, making the photograph feel more dynamic and alive.
Enhancing Depth and Perspective: By using the Rule of Thirds, photographers can create a more dynamic composition that adds depth and perspective, making the subject stand out. When subjects are properly aligned using this technique, it can provide a three-dimensional feel to a two-dimensional image.
Breaking Away from Centered Compositions: Using this rule encourages photographers to move away from the common centered composition, resulting in more interesting and engaging photographs. Centered subjects can often feel static, while applying the Rule of Thirds can introduce a sense of balance and intrigue.
In What Ways Can Leading Lines Guide the Viewer’s Eye in Your Photos?
Leading lines are powerful compositional tools that significantly enhance the visual impact of photographs, especially when using a point-and-shoot camera. These lines, which can be natural or man-made, draw the viewer’s attention and guide their gaze through the image, creating a sense of depth and perspective.
Here are effective ways leading lines can guide the viewer’s eye:
-
Directing Focus: Use roads, pathways, or rivers that lead all the way to the horizon or a focal point. This encourages the viewer to follow the line to the subject you want to highlight.
-
Creating Depth: Incorporate lines that pull the viewer into the scene. For example, a fence stretching into the distance can create layers, making the photo feel three-dimensional.
-
Emphasizing Patterns: Utilize architectural elements like stairs or railings. These patterns can help to create a rhythm in the image, enhancing visual interest.
-
Framing the Subject: Arrange leading lines around your main subject. This frame can highlight important elements in the image and provide context.
By smartly incorporating leading lines, your point-and-shoot photography can become more compelling and organized, transforming ordinary shots into striking compositions.
How Can You Ensure Sharp and Clear Images with a Point and Shoot Camera?
Experimenting with different shooting modes available on your point and shoot camera can yield diverse results. Using modes designed for specific conditions, like landscape or portrait, can help you capture images that are optimized for the scene you are photographing.
Why Is a Steady Hand Crucial When Taking Photos?
A steady hand is crucial when taking photos because it minimizes blur and ensures sharpness in the image, which is particularly important in low-light situations or when using slower shutter speeds.
According to the American National Standards Institute (ANSI), camera shake is one of the leading causes of blurry images, especially in handheld photography. Research indicates that even slight movements can lead to noticeable blur, particularly when the focal length of the lens is increased, as noted by the Photography Academy. The “1/focal length” rule states that to avoid camera shake, the shutter speed should be at least the inverse of the focal length in use, which underscores the need for stability.
The underlying mechanism involves the physics of motion and light capture. When a camera is in motion during exposure, the light hitting the sensor or film is distributed unevenly, leading to a smeared effect. This is exacerbated by the inertia of the camera body; even small tremors can be magnified when a longer lens is used. Additionally, the human hand is naturally prone to small involuntary movements, making stabilization techniques—such as holding the camera with both hands, using a tripod, or leaning against a solid object—essential for achieving clear images, especially for point-and-shoot cameras that often have limitations in image stabilization technology.
When Should You Use a Tripod for Better Stability?
Using a tripod can significantly enhance the stability and quality of your photos, especially in certain situations.
- Low Light Conditions: When shooting in low light, a tripod is essential as it allows for longer exposure times without the risk of camera shake. This is particularly useful for night photography or indoor settings where natural light is limited.
- Long Exposure Shots: For capturing long exposure images, such as waterfalls or star trails, a tripod ensures that your camera remains completely still during the extended shutter release. This stability prevents blurriness, allowing you to achieve the desired ethereal effect in your images.
- Macro Photography: In macro photography, even the slightest movement can result in an out-of-focus shot. A tripod helps maintain the exact position of your camera, enabling you to capture intricate details with precision.
- Panoramic Shots: When taking panoramic photos, a tripod provides a stable platform to pivot the camera smoothly across the scene. Using a tripod ensures that each shot aligns perfectly, resulting in a cohesive final image without distortions.
- Self-Portraits or Group Shots: When you’re in the picture or need to include multiple people, a tripod helps position your camera at the right angle. This allows you to set a timer or use a remote shutter, ensuring everyone is included while maintaining a stable shot.
- Using Slow Shutter Speeds: If you plan to use slow shutter speeds to capture motion blur, like flowing water or moving clouds, a tripod is crucial to prevent camera shake. This technique can create dramatic effects, and stability is key to achieving the desired outcome.
How Does Lighting Influence Your Photography with a Point and Shoot Camera?
Lighting significantly affects the quality and mood of photographs taken with a point and shoot camera.
- Natural Light: Utilizing natural light can enhance the vibrancy and clarity of your images. Shooting during the golden hour, shortly after sunrise or before sunset, provides a soft, warm light that flatters subjects and reduces harsh shadows.
- Artificial Light: When shooting indoors or in low-light conditions, artificial lights, such as lamps or flash, can help illuminate your subject. It’s important to be mindful of the color temperature of your light sources, as different lights can create unwanted color casts if not balanced properly.
- Diffused Light: Using diffusers, such as softboxes or even sheer curtains, can soften harsh sunlight or direct flash, resulting in more flattering portraits. This technique helps to minimize shadows and creates a more even lighting across the subject.
- Backlighting: Positioning your subject in front of a light source can create dramatic silhouettes and highlight textures. However, it requires careful exposure adjustments to ensure that the subject is not completely lost in shadow.
- Reflectors: Using reflectors can bounce light back onto your subject, filling in shadows and adding dimension to your images. This is especially useful in outdoor photography where natural light can be unpredictable.
- Understanding Exposure Settings: Familiarizing yourself with your camera’s exposure settings, such as ISO, aperture, and shutter speed, allows you to adapt to various lighting conditions. Adjusting these settings can help you achieve the desired effect regardless of the available light.
What Tips Can Help You Utilize Natural Light Effectively?
Utilizing natural light effectively can significantly enhance your photography, especially when using a point and shoot camera.
- Golden Hour: Shoot during the golden hour, which is the hour after sunrise and before sunset, to capture warm, soft light that enhances the mood of your photos.
- Use Reflectors: Employ reflectors or even white surfaces to bounce light onto your subject, filling in shadows and creating a more balanced exposure.
- Avoid Harsh Midday Sun: Try to avoid shooting in the harsh midday sun, which can create unflattering shadows and overexposed highlights; instead, look for shaded areas or wait for the light to soften.
- Positioning: Pay attention to the direction of light; positioning your subject with the light source behind or to the side can create depth and interesting highlights.
- Experiment with Angles: Move around your subject to find the best angle that captures the light effectively, as different perspectives can dramatically change the quality and mood of the light in your photos.
The golden hour provides a natural filter, enriching colors and reducing harsh contrasts, making it an ideal time for stunning photographs. Using reflectors can help manipulate natural light, allowing you to control how it interacts with your subject. Avoiding the harsh midday sun is crucial because it can lead to excessive contrast that may detract from your images. By understanding light direction and experimenting with angles, you can enhance the visual appeal of your photos, creating more dynamic and engaging compositions.
When Is the Best Time to Use Flash in Your Shots?
The best times to use flash in your shots include:
- Low Light Conditions: Using flash in low light situations helps to illuminate your subject, ensuring that your images are bright and clear. This is especially useful when shooting indoors, at dusk, or in shaded areas where natural light is insufficient.
- Backlit Subjects: When your subject is positioned against a bright background (like the sun), the flash can help to fill in the shadows on your subject’s face, creating a more balanced exposure. This technique is beneficial for portrait photography, allowing for more detail and color in your subject.
- Freeze Motion: If you’re capturing fast-moving subjects, such as children playing or pets running, using flash can help freeze the action by providing a quick burst of light. This can result in sharper images with reduced motion blur, enhancing the overall quality of your shots.
- Macro Photography: When photographing small subjects up close, using flash can illuminate fine details that might be lost in shadows. It allows for more vibrant colors and textures, making your macro images more striking and visually appealing.
- Creative Effects: Flash can be used creatively to add drama or highlight specific areas of your composition. Techniques like slow sync flash allow you to capture ambient light along with the flash, creating an interesting contrast between the subject and the background.
What Post-Processing Tools Can Enhance Your Point and Shoot Images?
Several post-processing tools can significantly improve the quality of images taken with point-and-shoot cameras.
- Adobe Lightroom: A powerful editing software that allows users to enhance their photos through adjustments in exposure, contrast, and color balance.
- Photoshop: Known for its advanced editing capabilities, Photoshop enables users to manipulate images in greater detail, including retouching and layer management.
- GIMP: A free alternative to Photoshop, GIMP offers similar features for image editing, making it accessible for those on a budget.
- Canva: This user-friendly graphic design tool allows for basic image edits and the addition of text or graphics, ideal for social media sharing.
- Snapseed: A mobile app that provides a wide range of editing tools and filters, perfect for quick edits on-the-go.
- Fotor: An online tool that offers photo editing capabilities along with design templates, great for creating collage and promotional material.
Adobe Lightroom is particularly favored for its non-destructive editing capabilities, allowing photographers to make adjustments without permanently altering the original image. It includes features like presets, which can save time by applying a set of edits with one click.
Photoshop is often considered the industry standard for photo editing, providing an extensive array of tools for precise control over all aspects of an image. Users can perform complex edits, such as removing unwanted elements or applying artistic effects, making it suitable for detailed retouching.
GIMP, being open-source, is a cost-effective solution for those needing robust editing tools. It supports a variety of plugins and has a wide community offering tutorials, making it a versatile choice for users looking to learn more about image editing.
Canva is ideal for beginners and those who want to create visually appealing content quickly. It offers drag-and-drop functionality, making it easy to add text, graphics, and filters to images before sharing them online.
Snapseed is particularly useful for smartphone users, as it provides a comprehensive set of editing features in an easy-to-use mobile interface. Its selective editing tools allow users to enhance specific areas of an image, which is great for highlighting details.
Fotor stands out with its combination of photo editing and graphic design capabilities. Users can easily create collages, add effects, and utilize templates, making it a popular choice for social media marketing and personal projects alike.
How Can You Continuously Improve Your Photography Skills with a Point and Shoot Camera?
To continuously improve your photography skills with a point and shoot camera, consider the following tips:
- Understand Your Camera Settings: Familiarize yourself with the key settings of your point and shoot camera, including exposure, ISO, and white balance.
- Practice Composition Techniques: Use compositional rules such as the rule of thirds, leading lines, and framing to enhance your images.
- Experiment with Lighting: Take photographs in various lighting conditions to learn how light affects your images.
- Utilize the Macro Mode: Explore the macro mode feature to capture detailed close-up shots of subjects, which can enhance your creative portfolio.
- Review and Analyze Your Photos: Regularly review your photographs to identify strengths and areas for improvement, and seek feedback from others.
- Join Photography Communities: Engage with photography groups or online forums to share your work, gain inspiration, and learn from others’ experiences.
- Challenge Yourself with Themes: Set specific challenges or themes for your photography sessions to push your creative boundaries.
Understanding your camera settings is crucial as it allows you to manipulate the camera’s capabilities to suit the scene you are trying to capture. By mastering exposure control, adjusting the ISO for different lighting conditions, and setting the correct white balance, you can significantly improve the quality of your photos.
Practicing composition techniques helps to create visually appealing images. Implementing the rule of thirds or utilizing leading lines can guide the viewer’s eye and make your photos more engaging.
Lighting plays a vital role in photography, so experimenting with different lighting scenarios, such as golden hour or harsh midday sun, can teach you how to adapt and enhance the mood of your shots.
The macro mode is a fantastic feature of many point and shoot cameras that allows you to capture intricate details of small subjects, such as flowers or insects, which can lead to stunning photographs that highlight textures and colors.
Reviewing and analyzing your photos is essential for growth; by reflecting on what works and what doesn’t, you can develop a more critical eye and refine your technique. Seeking constructive feedback from friends or online communities can also provide new perspectives and insights.
Joining photography communities gives you access to a wealth of knowledge and support from fellow enthusiasts. Sharing your work and receiving critiques can motivate you to continue improving your skills while also inspiring you with new ideas.
Challenging yourself with specific themes or projects can stimulate creativity and encourage you to think outside the box. Whether it’s capturing everyday objects or exploring a particular color palette, having a focus can elevate your photography practice.
Related Post: