Are you ready to unleash your creativity and craft your very own helmet from scratch? Whether you’re a cosplayer looking for the perfect accessory, or someone who wants to add a personal touch to their safety gear, this DIY guide is for you. Follow our step-by-step tutorial and learn how to make a helmet at home.
Making your own helmet may seem like a daunting task, but with the right materials and instructions, it’s a rewarding and enjoyable experience. From forming the base to adding intricate details, we’ll walk you through each stage of the process. So, grab your tools and let’s get started!
Key Takeaways:
- Learn how to make a helmet at home with this step-by-step DIY guide.
- Gather the necessary materials, including cardboard, glue, sandpaper, and more.
- Form the base of the helmet using templates and glue.
- Create a dome frame to give the helmet its characteristic shape.
- Add personalized details to make your helmet unique.
Step 1: Materials
Before you start making your homemade helmet, it’s important to gather all the necessary materials. Here’s a list of what you’ll need:
- Cardboard sheet (preferably 1/16 inch thick)
- White glue
- Sandpaper
- Hot glue gun
- Lightweight spackling paste
- X-Acto knife
- Minwax Polycrylic sealer
To ensure the best results, it’s crucial to select the right type of cardboard sheet. Corrugated cardboard won’t work for this project, so opt for newspaper board or Ram Board. These materials provide the necessary sturdiness and flexibility for crafting a helmet.
Additionally, the right adhesive and finishing products will ensure a strong and professional-looking final product. The white glue acts as a strong adhesive to hold the helmet together, while the lightweight spackling paste helps fill any imperfections or uneven surfaces. The Minwax Polycrylic sealer adds a protective coating and creates a smoother surface for painting.
Step 2: Forming the Base
Once you have gathered your materials, the next step is to form the base of the helmet. This involves using templates specific to the helmet design you want to create. These templates can be found online or created yourself. Cut out the templates and glue them to the cardboard sheet. These templates will help establish the basic shape of the helmet. Depending on the design, you may need to join multiple pieces together to create the desired form.
Forming the base is a crucial step in the helmet crafting process as it sets the foundation for the overall structure. By using templates, you ensure accuracy and consistency in the shape of your helmet. Templates provide a guide for cutting and assembling the cardboard pieces, making the construction process more manageable.
Here are the key steps to forming the base of your handmade helmet:
- Choose a helmet design and find or create templates for that specific design.
- Print or draw the templates on a suitable material (e.g., paper or cardboard).
- Carefully cut out the templates, ensuring precise edges.
- Apply glue to the back of the templates.
- Position the templates on the cardboard sheet, aligning them according to the design.
- Press the templates firmly onto the cardboard to secure them in place.
- Allow the glue to dry completely before moving on to the next steps.
By following these instructions, you establish a solid base for your helmet, laying the groundwork for the subsequent steps in the crafting process. Take your time and pay attention to the details to ensure a well-formed and sturdy base.
Example Template:
Visual representation of a helmet base template. Use this as a reference and adapt it to your chosen design.
Step 3: Creating the Dome Frame
The dome of the helmet is a key component that gives the helmet its characteristic shape and structure. To create the dome frame, follow these steps:
- Start by making a cardboard ring that fits the circumference of the top of the helmet. Use a sturdy cardboard sheet for durability.
- Apply white glue to the inner side of the cardboard ring and securely glue it into place at the top of the helmet.
- Next, create two interlocking cardboard semicircles that will form the dome frame. These semicircles should have a radius slightly larger than the ring.
- Apply white glue to the edges of each semicircle and carefully position them on top of the cardboard ring. Ensure they interlock properly to create a solid dome frame.
- Press the semicircles firmly against the ring to strengthen the bond. Allow the glue to dry completely.
By creating this separate dome frame, you provide crucial support to the top of the helmet, ensuring its stability and structural integrity.
Benefits of the Dome Frame
The dome frame serves multiple purposes, including:
- Enhancing the overall strength of the helmet
- Creating a smoother and more rounded shape for the top of the helmet
- Providing a framework for attaching additional helmet components or accessories
The dome frame is an essential step in the helmet-making process, contributing to the overall quality and appearance of your homemade helmet.
Dome Frame Illustration
For a visual reference of the dome frame creation process, refer to the illustration below:
 |
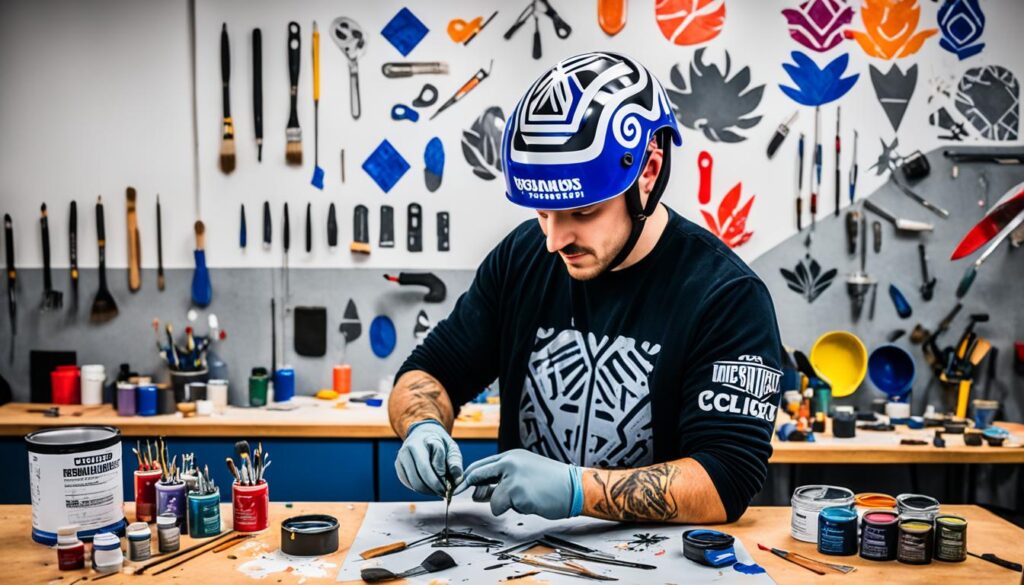
Step 4: Adding Details
Now that you have completed the base and dome frame of your helmet, it’s time to add those intricate details that will bring your creation to life. This step allows you to truly personalize your helmet and make it unique to your design.
Using additional templates or your own creativity, you can add various elements such as earpieces, mouth guards, and decorative accents. These details can be cut out of the cardboard sheet using precision and care. Make sure to utilize the gluing techniques mentioned earlier to securely attach each detail to the helmet.
Take your time during this process to ensure that each detail is properly aligned and attached. This will ensure that your helmet not only looks great but also maintains its durability.
Don’t be afraid to get creative and think outside the box when adding details to your helmet. This is your opportunity to showcase your individual style and make your helmet truly one-of-a-kind.
Step 5: Finishing Touches
The final step in this DIY helmet making guide is to give your homemade helmet a polished and finished look. Follow these steps to add the necessary finishing touches:
1. Apply lightweight spackling paste to fill in any imperfections or uneven surfaces on the helmet. Use a putty knife or your fingers to spread the paste evenly. Allow the paste to dry completely before moving on to the next step.
2. Once the spackling paste is dry, gently sand the helmet using sandpaper. Start with a coarse-grit sandpaper and gradually switch to finer-grit sandpaper to create a smooth surface. Be patient and take your time, as this process may require multiple applications and sanding sessions.
3. After sanding, it’s time to paint and finish your helmet. Begin by applying a coat of Minwax Polycrylic sealer to protect the surface and make it easier to paint. Allow the sealer to dry according to the manufacturer’s instructions.
4. Finally, prime and paint the helmet according to your desired design. Use spray paint or acrylic paint for best results. Add any additional details, such as a visor or foam padding on the inside, to complete your homemade helmet.
With these finishing touches, your DIY helmet will not only be functional but also visually appealing. Take pride in your craftsmanship and enjoy wearing your unique creation!
Source Links
- https://steel-mastery.com/how-to-make-a-helmet-doityourself-guide
- https://www.dremel.com/us/en/projects/how-to/how-to-make-a-foam-cosplay-helmet
- https://www.instructables.com/How-to-make-a-cardboard-costume-helmet/

Meet James Smith, affectionately known by friends as ‘Biker Smith’, your go-to expert at ‘Best HD Helmet Camera’. At 35, living in the USA, James embodies the spirit of adventure. His life is a thrilling ride, powered by his Harley Davidson Softail and BMW S 1000 RR, with his girlfriend as his favorite travel companion. A software developer by profession, James’s heart beats for the open road, making him a full-time traveler at heart. His passion for biking and technology merges seamlessly on this platform. Recognizing a gap in discussions around helmet cameras, he founded this blog to educate and inspire fellow enthusiasts. His mission? To elevate your riding experience with the best HD helmet camera insights, backed by firsthand experiences, rigorous testing, and a genuine love for the ride. Trust James to guide you through the world of helmet cameras, where quality, innovation, and safety ride together.